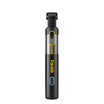
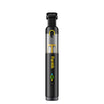
You can fix many common electronics problems at home instead of replacing them. With basic tools like the Fanttik T1 Max soldering iron kit, you'll be able to repair faulty game controllers, broken headphones, USB cables, and other electronics. The kit's 7-second heating and precision tools make repairs straightforward. This guide covers 10 common electronics fixes, complete with safety steps and practical tips to help you repair your devices properly and save money.
How to Prepare Your Workspace and Work Safely
Working with electronics requires proper safety measures and the right setup. A few simple preparations will help you complete your repairs successfully and safely.
Safety First
Before starting any repair, you need to take basic safety measures to protect yourself. Always work in a well-ventilated area to avoid breathing in solder fumes. Safety glasses are essential to protect your eyes from tiny bits of hot solder that might splash. Keep a clean, damp sponge close by - you'll need it to wipe the soldering tip regularly. The most important rule is to never touch the metal parts of the soldering iron while it's powered on. When you take breaks, make sure to unplug or turn off the soldering iron.
Setting Up Your Work Area
Your workspace needs to be organized and safe. Choose a flat, stable surface that's away from anything that could catch fire. A heat-resistant mat or metal surface makes an ideal base for your work. Good lighting is crucial - a desk lamp positioned over your work area works well. Keep your tools organized and within easy reach. A small fan pointed away from your work area helps direct any fumes away from you while you work.
Temperature Guide for Different Components
The Fanttik T1 Max's six temperature settings help you work safely with various components:
For SMD (Surface Mount) Components:
- Small components: 390-480°F (200-250°C)
- Medium components: 480-570°F (250-300°C)
- Large components: 570-660°F (300-350°C)
For Through-Hole Components:
- Basic connections: 570-660°F (300-350°C)
- Multi-layer boards: 660-750°F (350-400°C)
- Heavy-duty work: 750-840°F (400-450°C)
When removing components, start with a lower temperature and increase it only if needed. The green indicator light on the T1 Max shows when your chosen temperature is reached.
10 Common Electronics Repairs You Can Do at Home
Many electronics problems have simple solutions. Here are the most common repairs you can handle with your soldering kit, from gaming controllers to smart home devices.
1. Gaming Controller Repairs
Gaming controllers often develop issues with loose connections or worn buttons. To fix loose connections, locate the disconnected wire on the circuit board and resolder it using the T1 Max at 570°F. For worn-out buttons, clean the contact points with isopropyl alcohol and resolder any broken connections. Controller drift typically comes from worn potentiometers - these can be carefully desoldered and replaced with new ones.
2. Headphone and Audio Cable Repairs
Audio equipment frequently fails at the cable connections. When wires break near the plug, cut the cable, strip the wires, and solder them to a new audio jack at 660°F. For broken wires along the cable, carefully strip the outer jacket, identify the broken wire, and solder the connection. After repairs, reinforce stress points near plugs and joints with heat-shrink tubing.
3. USB Cable and Charging Cable Repairs
USB cables often fail where the connector meets the cable. Open the connector housing carefully, resolder any broken wires to the connector pins at 570-660°F, and secure the connections with electrical tape before reassembling. For damaged connectors, replace them entirely with new ones. Use heat-shrink tubing at cable joints to prevent future breaks.
4. Remote Control Repairs
Remote controls usually stop working due to dirty contacts or broken connections. Clean button contact points gently with isopropyl alcohol and a cotton swab. For broken circuit board traces, use the T1 Max at 480°F to apply solder to bridge any gaps. Battery connections often corrode - clean them thoroughly and resolder at 570°F for a solid connection.
5. LED Light Fixture Repairs
Flickering LEDs typically indicate power or connection problems. Check and resolder any loose wires at 570°F, particularly where the LED connects to the power supply. For LED strips, cut out damaged sections and solder in new pieces, making sure to match the polarity. Use flux for better solder flow on LED connections.
6. Small Appliance Switch Repairs
Faulty switches are common in small appliances. Remove the old switch carefully and solder in the replacement at 660°F, making sure all connections are secure. For loose connections, reflow the solder on the connection points. Control panel repairs usually involve resoldering loose components or cleaning corroded contacts.
7. Computer Peripheral Repairs
Mouse switches often fail after repeated clicking. Open the mouse carefully, remove the old switch, and solder in a new one at 570°F. Keyboard problems usually stem from loose connections on the circuit board - reflow solder on suspicious joints. For USB ports, clean the connections and resolder any loose pins at 660°F.
8. Smart Home Device Repairs
Sensor issues often come from loose connections. Use the T1 Max at 480°F to resolder any disconnected wires. Power supply problems typically involve failed capacitors or loose joints - replace any bulging capacitors and reflow solder on power connections. Check and resolder wire connections at stress points.
9. RC Toy Repairs
RC toys frequently need battery connection repairs. Clean the battery contacts and resolder loose wires at 570°F. Motor problems usually involve broken wires - strip and resolder them carefully. For circuit board issues, look for cold solder joints and reflow them at 660°F.
10. Circuit Board Component Replacement
Start by identifying failed components - look for bulging capacitors or discolored parts. Remove old components using the solder sucker, then clean the holes with fresh solder. Install new components at the recommended temperature for their size. For dry joints, apply fresh solder and flux at 660°F for a solid connection.
How to Use Your Soldering Iron Like a Pro
Mastering a few key techniques will make your repairs more successful. These pro tips help you get the most from your T1 Max soldering iron and keep your work efficient.
Making the Most of Auto Sleep Mode
The T1 Max enters sleep mode after 15 seconds of staying still, which helps save battery life and prevents accidents. Place the iron in its holder when you need both hands free - it will cool down automatically. When you pick it up again, it quickly returns to your set temperature. The red light flashes during heating, while the green light shows it's ready to use.
Proper Tinning for Better Results
Keep your soldering tip well-tinned for the best heat transfer. Apply a small amount of fresh solder to the tip before each repair job. When the tip starts looking dull or black, clean it on a damp sponge and add new solder immediately. A properly tinned tip appears shiny and silver, helping solder flow smoothly during repairs.
Controlling Temperature for Different Materials
Match your temperature to the task. Delicate components like small surface-mount parts need lower temperatures around 390-480°F. Standard electronics repairs work best at 570-660°F. Large components or thick wires may need up to 840°F. Always start at a lower temperature and increase it only if needed - this prevents damage to sensitive parts.
Getting the Best Results from Your Solder Sucker
Clean solder removal makes repairs easier. Hold the solder sucker vertically and place it close to the joint. Heat the solder until it melts completely, then quickly position the solder sucker and press the button. Clean the tip of the solder sucker regularly for the best suction. For tough spots, add a little fresh solder before trying to remove the old solder.
How to Maintain Your Soldering Iron for Long-Term Use
Regular maintenance keeps your soldering iron working like new. These simple care steps will extend the life of your T1 Max and ensure consistent soldering quality.
Daily Cleaning for Better Performance
Clean your soldering tip frequently while working - a quick wipe on a damp sponge helps remove oxidation and old solder. At the end of each repair session, clean the tip thoroughly and apply fresh solder to prevent rust. If you notice dark residue on your tip, use the brass wire cleaner in gentle circular motions to remove it.
Keeping Your Soldering Tips in Top Shape
Always tin your tip before and after use - this protective layer of solder prevents oxidation. Never file or sand your tips, as this damages the protective coating. If a tip stops accepting solder, clean it immediately and apply fresh solder while the iron is still hot. Replace tips that become pitted or misshapen, as they won't transfer heat properly.
Proper Storage Between Projects
Store your T1 Max in its aluminum case to protect it from dust and damage. Before storing, make sure the iron has cooled completely. Keep your soldering iron in a dry place - moisture can cause rust and electrical problems. The case's built-in compartments help organize your tips and accessories, keeping everything ready for your next project.
Troubleshooting Common Issues About Soldering
Even experienced users run into soldering issues occasionally. Here's how to identify and solve the most frequent problems you might encounter with your T1 Max.
Dull and Bumpy Solder Joints
Cold joints look dull, bumpy, or form a ball instead of flowing smoothly. To fix this, set your T1 Max to 570-660°F and heat both the component lead and the pad evenly. The solder should melt completely and form a shiny, cone-shaped connection. If the solder doesn't flow well, clean the tip, apply fresh solder, and try again. Remember to heat the joint enough before adding solder.
Burned Circuit Boards and Components
Watch for signs of overheating like discolored boards or bubbling solder. Start with lower temperatures and increase only if needed. If components feel hot beyond the immediate work area, you're using too much heat. Let the board cool between joints, and never hold the iron on one spot for more than 2-3 seconds. The T1 Max's temperature control helps prevent overheating - pay attention to the indicator lights.
Heat Damage to Delicate Electronics
Keep heat-sensitive components safe by using the right temperature and working quickly. Hold components with tweezers to absorb excess heat. For integrated circuits and transistors, solder one pin at a time and let the component cool between pins. Consider using a heat sink clip on sensitive component leads. If a component feels hot, stop and let it cool before continuing.
Get Started with Electronics Repair!
You can repair many electronics problems at home with the Fanttik T1 Max soldering iron kit. Its quick heating and precise temperature control help you make professional-quality repairs. Following the safety steps and proper techniques in this guide, you can fix gaming controllers, headphones, cables, and other devices. You'll save money on replacements while learning useful repair skills. Keep this guide nearby when you start your first repair.











Leave a comment
All comments are moderated before being published.
This site is protected by hCaptcha and the hCaptcha Privacy Policy and Terms of Service apply.