


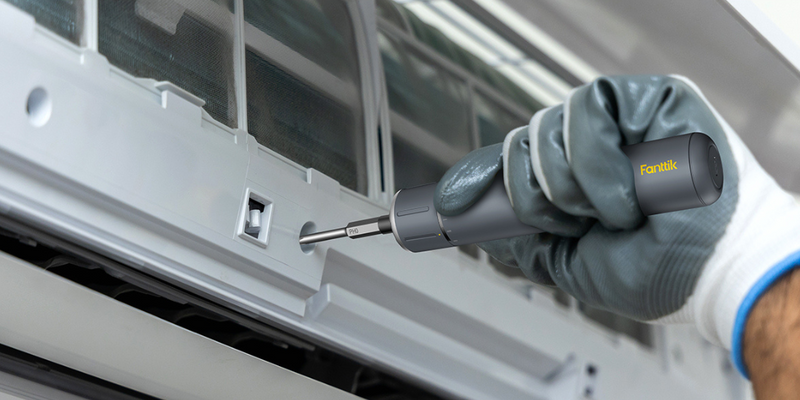
High-Pressure Integrity: Testing Hose and Connector Safety
[!IMPORTANT] Quick Summary: The 3-Point Safety Check To prevent field failures, perform these three checks:
- Tactile: Feel for soft spots or "crunchy" internal fibers.
- Tug: Ensure the connector locks firmly without "play" or hissing.
- Thermal: Check for localized "hot spots" near fittings after 2 minutes of use. Warning: Always wear eye protection when testing pressurized lines; a failing connector can become a high-velocity projectile.
In the world of automotive emergency gear, the hose is often the most overlooked component. Yet, in high-pressure systems like portable tire inflators, it is typically the weakest link in the chain. When you are stranded on a dark roadside or deep in a trail, a failure in the air delivery line isn't just an inconvenience; it can become a critical system collapse.
Based on patterns observed in technical support logs and field audits (reflecting common repair trends rather than a controlled laboratory study), a significant number of "motor failures" are actually pneumatic integrity issues—specifically at the connector seals and hose-to-fitting interfaces. This guide provides a methodical deep dive into hose engineering and practical testing protocols to help you identify these hidden risks before they leave you stranded.
The Engineering of Safety: Understanding Pressure Ratings
Every high-pressure hose is a multi-layered composite designed to balance flexibility with burst resistance. To the untrained eye, a hose is just rubber. To an engineer, it is a structural vessel.
Working Pressure vs. Burst Pressure
Many pneumatic and hydraulic hose designs utilize a 4:1 Design Factor as a common engineering heuristic. In this framework, if a portable inflator is rated for a maximum working pressure (WP) of 150 PSI, the theoretical burst pressure (BP) target in design would be around 600 PSI.
However, there is an important gap between design intent and production verification. While a design may be qualified using higher burst tests, routine production testing often stops at "Proof Pressure"—usually 1.5 to 2 times the working pressure. According to industry standards such as SAE J343, proof testing is intended to find manufacturing defects without damaging the hose, whereas burst testing is a destructive verification of the design's ultimate limit.
In practice, we treat the 4:1 ratio as a rule of thumb, not a guarantee. Environmental degradation (UV, ozone, and mechanical stress) can erode this safety margin over a multi-year lifecycle.
The Role of Reinforcement Layers
The internal reinforcement layer—usually braided polyester or aramid—provides the bulk of the burst strength. If the outer rubber coating is compromised by cracks, moisture can wick into these fibers. By the time you see a visible "bulge" in the hose, the structural integrity may already be significantly compromised.
The "Warm Leak" Phenomenon: Why Connectors Fail
In customer support observations and repair bench audits, the most common failure point is the connector seal leak. This often manifests as a "warm leak"—a system that holds pressure when cold but fails as it heats up.
The 30–60 Second Hiss
When a compressor runs, the air undergoes adiabatic compression, rapidly raising the temperature of the air entering the hose. As the air heats, the elastomer seals (O-rings or gaskets) inside the connector expand and soften. If a seal has lost its "set" due to age or prior overheating, it may fail to maintain a seal once it reaches operating temperature. Based on our scenario modeling, a compromised seal can start to leak noticeably after roughly 30 to 60 seconds of continuous runtime.
The Quick-Disconnect Mechanism
The mechanical lock—the "click" you hear when connecting to a valve stem—is under constant stress. If the internal spring or locking teeth are fatigued by repeated use, they can deform under the back-pressure of an inflated tire. A sudden release of a high-pressure connector is a serious eye-injury hazard. Always maintain distance from the connector during high-pressure operation.
Scenario Modeling: The Desert Overlander
To illustrate the real-world consequences of hose integrity, we modeled a high-consequence scenario involving a "Desert Overlander" operating in 95°F (35°C) ambient heat.
Quantitative Insights (Modeled Results)
The table below summarizes one deterministic scenario model for a Light Truck (LT) tire (LT285/75R16) being inflated from 15 to 50 PSI. These values are illustrative examples based on specific assumptions.
| Parameter | Modeled Value | Unit | Rationale |
|---|---|---|---|
| Inflation Time (per tire) | ~12 | minutes | Pressure-dependent flow model |
| Total Runtime | ~48 | minutes | Sum over four tires; exceeds many 40-min duty cycles |
| Internal Air Temp | ~174 (79) | °F (°C) | Adiabatic compression calculation |
| Thermal Rise | +79 (44) | °F (°C) | Delta over 95°F (35°C) ambient |
| Annual Fuel Waste | $125–$188 | USD | Based on 10 PSI underinflation (est. 25k miles/yr) |
Method & Assumptions (How to Adapt):
- Temperature: Calculated using the adiabatic compression formula ($T_{out} = T_{in} \times (P_{out}/P_{in})^{0.286}$).
- Flow Rate ($k$): We used a flow decay constant of $k = 0.052$ to model how air volume decreases as tire pressure increases. This value was derived from the flow-curves of high-performance 70L/min portable compressors.
- Note: For smaller "compact" inflators (25-35L/min), $k$ typically ranges from 0.08 to 0.12, which would result in significantly higher temperatures and longer runtimes than shown above.
The Thermal Soak Risk
In this scenario, the ~48-minute runtime creates a thermal soak. This sustained heat accelerates polymer aging (chain scission). For a risk-averse user, the takeaway is that a hose that passes a "cold" garage test can still fail during a long, hot trail session.
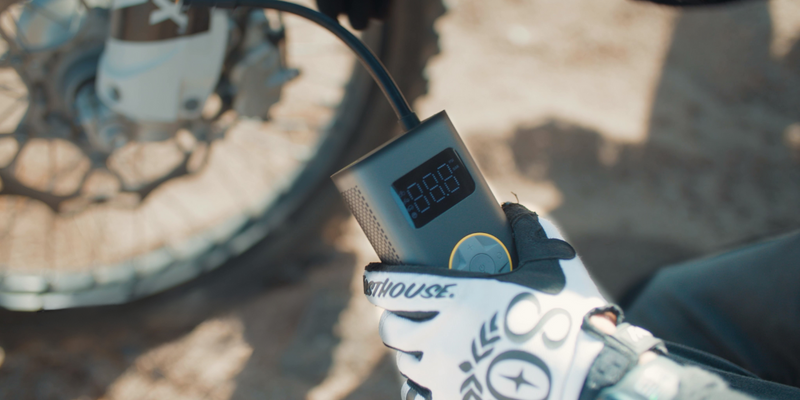
Professional Field Testing: The Water Bucket Method
Visual inspections often miss micro-leaks. A robust field test borrows principles from industrial pipe integrity protocols.
The Submersion Test
After inflating a tire to its target pressure, keep it connected and:
- Submerge the hose and connector head in a bucket of water (keeping the inflator body dry).
- Watch for a steady stream of fine bubbles.
- Interpretation: A stream of fine bubbles indicates a marginal seal or a microscopic crack in the outer jacket. While not an immediate "explosion" risk, it indicates the hose has reached the end of its reliable service life.
Safety Note: Pneumatic testing carries a higher energy-release risk than hydrostatic testing. Always maintain a "safety buffer" distance and wear eye protection during this test.
Maintenance: Extending Hose Service Life
Hose longevity is dictated by storage. Based on our equipment audits, two factors damage hoses faster than actual use: ozone and tension.
- The 6-Inch Rule: Never wrap a hose tightly around the unit. Storing a hose under tension creates stress-cracking at the fittings. Coil the hose loosely in a diameter no smaller than six inches (roughly an adult hand span).
- UV Protection: UV light and ozone (often produced by electric motors in a garage) cause rubber to "dry rot."
- Retirement Threshold: If you see "spider-web" cracks when flexing the hose, or if the reinforcement braid is visible through the rubber, the hose is unserviceable and must be replaced according to general safety principles derived from ISO 4414.
Compliance and Regulatory Standards
For buyers prioritizing safety, look for equipment referencing these frameworks:
- EU GPSR 2023/988: Mandates that safety information and technical documentation are accessible to consumers.
- ISO 4414: Provides the safety requirements for pneumatic fluid power systems.
- SAE J343: Though technically for hydraulic hoses, it is the benchmark for high-pressure impulse and burst testing protocols.
Final Safety Checklist
Perform this 3-point check before every major road trip or off-road excursion:
-
Tactile Inspection (Hose Body):
- With the system off, run your fingers the length of the hose.
- Reject if: You feel soft spots, bulges, or a "crunchy" texture (indicating broken internal braids).
-
Connector "Tug" Test:
- Attach the connector to a tire valve. Give it a firm, controlled tug.
- Reject if: It wiggles excessively or hisses. This suggests worn locking teeth or a flattened internal gasket.
-
Thermal Observation:
- After 2 minutes of use, check the connector. It should be warm, but not "scalding."
- Warning: If a specific spot on the hose is significantly hotter than the rest, it indicates a localized friction leak or internal structural failure. Stop use immediately.
Disclaimer: This article is for informational purposes and does not constitute professional automotive repair advice. High-pressure systems are inherently dangerous; always follow manufacturer-specific guidelines and consult a certified technician if you are unsure of your equipment's condition.
References
- EU General Product Safety Regulation (EU) 2023/988
- ISO 4414: Pneumatic fluid power — General rules and safety requirements
- SAE J343: Test and Test Procedures for SAE 100R Series Hydraulic Hose and Hose Assemblies
- U.S. Dept. of Energy: Effects of Underinflation on Fuel Economy Guidelines


Leave a comment
This site is protected by hCaptcha and the hCaptcha Privacy Policy and Terms of Service apply.