












































To tin stranded wire, strip the end, put the strands back in their original twist, and clean them. Then heat the bare strands with your iron, feed solder where the tip touches the wire, and slide the iron along the bare section before you lift it away. Stranded wire tinning binds loose strands into one firm end, but it doesn't hold the wire in place, so you still need to position and support the wire so the finished joint isn't under strain.
The steps below follow a NASA hand-soldering training procedure and a NASA soldering standard. Neither source gives an iron temperature or a contact time. Use a tinned end only in a connection whose instructions allow pre-tinned wire.
How to Tin Stranded Wire With a Soldering Iron
Work through these steps in order, from the cut end back toward the insulation. They describe stranded wire tinning by hand with an iron, not dipping the wire in a solder pot.

- Confirm the connection accepts pre-tinned wire. Do this before you heat anything. The next section explains how to check.
- Restore the strand lay and clean the conductor. "Lay" is the original twist and arrangement of the strands. If stripping loosened or splayed them, gently twist them back into place. NASA-STD-8739.3 conductor preparation calls for restoring disturbed lay, cleaning the conductor, and then tinning and cleaning the part that will become the solder connection.
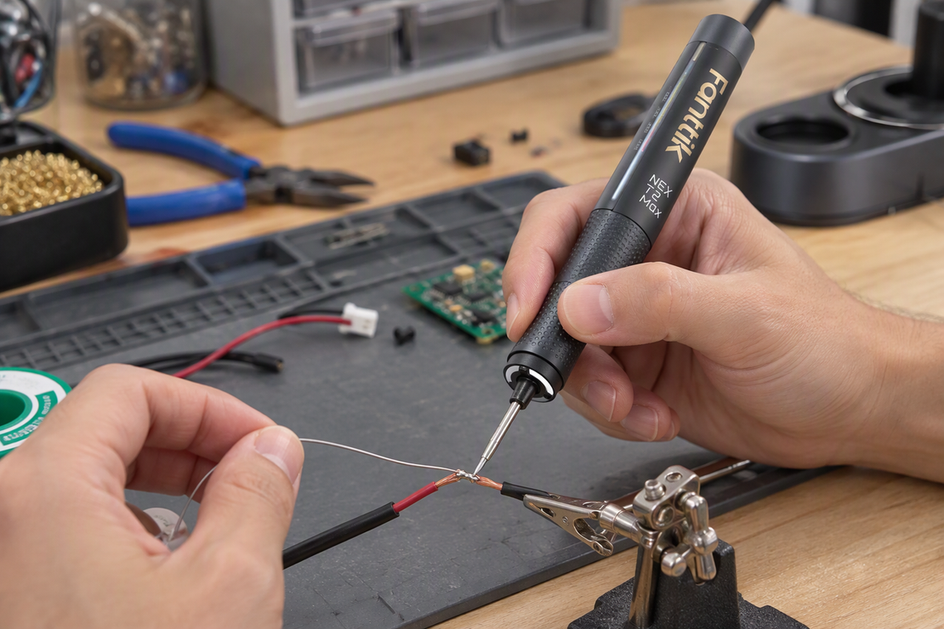
- Secure the stripped wire. NASA's hand-tinning procedure starts by holding the wire steady so it can't shift while solder flows. A small clamp or helping-hands stand frees both of your hands for the iron and solder.
- Apply flux if you're using liquid flux. The NASA standard allows liquid flux, but it must be applied with care so it doesn't flow under the insulation. Put it on the bare strands only, and follow the flux maker's directions.
- Place the iron tip against the wire near the cut end. A tip that makes solid contact with the strands heats them faster than one that touches at a single point. Our guide to soldering iron tip shapes explains how chisel, conical, bevel, and knife tips differ in contact area for wiring work.
- Feed solder where the iron meets the wire. Touch the solder to that contact point instead of melting it onto the iron alone. That way the heated strands pull the solder in.
- Move the iron along the wire as you add solder. Work from the cut end toward the insulation. In the NASA workbook's procedure, tinning stops no closer than 0.5 mm (0.020 in.) from the insulation, so keep that small bare gap (the workbook's insulation clearance).
- Withdraw the iron and let the wire cool undisturbed. Don't blow on it or bend it while the solder sets. Once it's cool, clean the tinned section, because the standard calls for both tinning and cleaning before attachment.

You won't find a heat setting in these sources. The NASA standard does give a five-second maximum, but the solder-bath-only limit covers dipping conductors in a solder bath. It doesn't tell you how long to hold an iron on the wire.
How to Check Whether a Terminal Allows Pre-Tinned Wire
Check the instructions for the exact terminal or joining method before you tin, because pre-tinning doesn't suit every connection. Start by identifying the specific part: the terminal model, connector, or device the wire will go into, plus how it attaches the wire.
Next, read the documentation that governs that connection. That can be the terminal maker's instructions, an assembly drawing for the project, or process requirements that apply to your work. Look for two things: how the conductor should be prepared, and how it should be attached.
What you find decides the next step:
- The instructions explicitly accept pre-tinned or soldered conductors. Tin the wire and stay within any limits those instructions set.
- The instructions call for a different preparation or method. Follow the specified method instead of tinning.
- The instructions say nothing about it. Silence isn't permission. Use the method the instructions do describe, or ask the manufacturer before you tin.
Don't borrow a general rule for screw, clamp, or other terminal types from the NASA standard. That standard covers soldered electrical connections. It doesn't settle whether a particular terminal accepts tinned wire.
How to Inspect and Support the Tinned End
A good tinned end has solder over every strand, and you can still see the outline of each strand. That matches NASA's coverage and strand criterion: 100 percent coverage of the tinned surface, with the wire strands still distinguishable.
Look at the end under good light and turn it so you see all sides. Bare copper spots mean coverage is incomplete, so redo the end. If solder has buried the strand outlines in a smooth blob, it doesn't meet that criterion either. Then check the insulation edge. The solder should stop short of it, following the workbook clearance from the steps above, and flux shouldn't have run underneath. If the insulation looks damaged, prepare a fresh end before you join it.
Stranded wire tinning doesn't make the joint strong enough to hold the wire. Before you finish the connection, route the wire so it isn't pulling, twisting, or levering on the joint. The NASA stress-relief guidance calls for stress relief wherever possible. The same standard requires hookup wire longer than 1 inch (2.54 cm) to be supported by something other than the solder connection or conformal coating (the NASA hookup-wire support threshold). For a simple test after joining, let go of the wire. If it sags, springs back, or pulls on the joint, add a clip, tie point, or other support so the solder isn't carrying the load.
FAQs
What soldering iron temperature should I use for tinning stranded wire?
The NASA workbook and standard used here don't give an iron temperature, so check the documentation for your iron and your solder. Keep two numbers separate. A solder's melting range tells you when the solder turns liquid. An iron's working temperature is the setting at the tip, and it isn't the same figure.
Can I tin stranded wire in a solder pot instead of with an iron?
Yes, NASA-STD-8739.3 lists both solder pots and hand tinning with a soldering iron as tinning methods. If you dip the wire in a solder bath, that standard limits immersion to 5 seconds. The 5-second figure applies only to bath dipping, not to how long an iron touches the wire.
What does restoring the strand lay mean?
Strand lay is the way the individual strands twist together in the finished wire. Stripping insulation can loosen or fan out that twist. Restoring it means gently twisting the strands back into their original pattern before you clean and tin them, so the solder binds a neat bundle and not a spread of loose strands.
Do I have to follow NASA's soldering rules for a hobby project?
Not necessarily. NASA-STD-8739.3 is a December 1997 standard establishing technical requirements specifically for NASA soldered electrical connections. While its steps and inspection points serve as a detailed technical reference on the workbench, mandatory requirements depend on your specific project specifications, contract, or component instructions.

Leave a comment
This site is protected by hCaptcha and the hCaptcha Privacy Policy and Terms of Service apply.