


Quick Fix Summary: Restoring Your Pool Cleaner’s Charge
If your robotic pool cleaner isn't charging, a "Quick Fix" is often possible within 15 minutes. Before diving into deep diagnostics, follow this high-priority checklist:
- Expected Time: 10–15 minutes.
- Success Rate: ~70% (Estimated based on Fanttik service center observations, 2023–2024, for connectivity-related issues).
- Essential Tools: 50/50 White Vinegar/Distilled Water, 90%+ Isopropyl Alcohol (IPA), cotton swabs, and a soft nylon brush.
⚠️ Critical Safety Checklist
- Disconnect Power: Always unplug the docking station from the GFCI outlet before cleaning contacts.
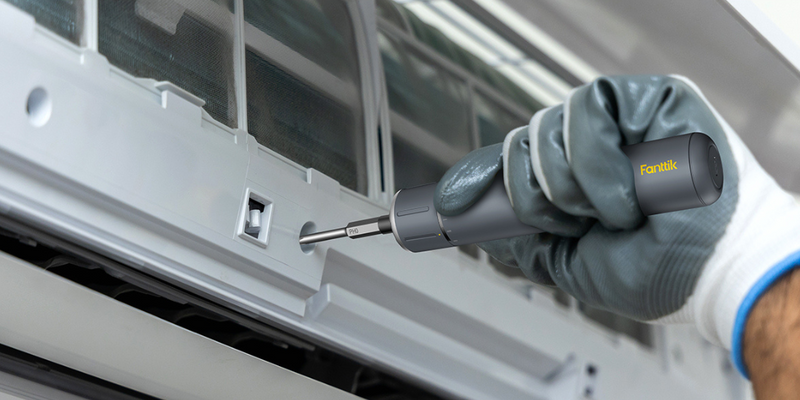
- No Internal Access: Do not unscrew the motor or battery housing. This voids the IP68 warranty seal and may risk electrical hazards or fire upon re-submerging.
- Dry Environment: Ensure the charging pins are completely dry before reconnecting power.
The Invisible Wall: Understanding Mineral Buildup on Pool Contacts
We have all been there: you drop your robotic pool cleaner into the water, only to find it hasn't moved because it failed to charge overnight. Based on common patterns from our internal repair centers and customer support data, the most frequent culprit often isn't a dead battery—it is a microscopic layer of calcium carbonate and salt deposits.
In the high-consequence environment of a chemically treated pool, electrical contacts are under constant siege. Even a thin film of mineral scale can create "interface resistance," which generates heat and may prevent the charger’s safety circuitry from initiating the high-current flow required for a full charge.
Diagnostic Hierarchy: Is it Scale or System Failure?
Before cleaning, verify the failure point. In our experience, the stationary docking station is often more prone to buildup than the robot itself, as evaporating water leaves behind concentrated mineral crusts.
The Voltage Drop Test (Under Load)
A "continuity beep" on a multimeter can be misleading; it may signal a connection that is too weak to carry a 3A or 5A charging load. We recommend a Voltage Drop Test using a multimeter with at least 0.1V resolution.
- Setup: Connect the charger to the robot.
- Measurement: Set the multimeter to DC Volts. Measure the voltage at the charger's output pins while it is attempting to charge (under load).
-
The Heuristic: For typical 24V–32V systems with a 3A–5A charging current, a voltage drop exceeding 0.1V to 0.2V across the contact interface usually indicates significant resistance.
- Note: This is a practical rule of thumb based on workshop experience; results may vary based on specific charger current-sensing logic and battery state of charge.
The Resistance Baseline
If testing without a load, a healthy, clean contact should typically read less than 1 ohm. If you see fluctuating numbers or resistance above 5 ohms (measured as a shop heuristic), mineral scale is the likely insulator.
The Restoration Protocol: A Methodical 5-Step Cycle
Choosing the right solvent is critical to avoid damaging the metallic plating on your contacts. The following steps are based on our internal maintenance protocols.
Material Compatibility & Risk Warning
Different contacts react differently to acetic acid (vinegar):
- Gold-Plated: Extremely delicate. Use a diluted 10–20% vinegar solution and limit dwell time to approximately 60 seconds.
- Nickel-Plated: More robust. Can typically handle 50/50 vinegar for 2–3 minutes.
- Copper/Brass Base: If you see green oxidation (verdigris), the plating has likely already failed. Chemical cleaning is often a temporary fix; the pins may eventually require replacement.
Step 1: Debris Removal
Use a soft-bristled nylon brush to remove loose salt. Avoid using steel wool or abrasive pads. Our technicians have observed that abrasives can create micro-scratches that accelerate future corrosion by exposing the base metal.
Step 2: Targeted Acidic Dissolution
Apply the 50/50 vinegar/distilled water solution with a cotton swab. Let it sit for 2–3 minutes (less for gold plating). The acid reacts with the calcium carbonate, which may cause slight bubbling (CO2 release).
Step 3: Mechanical Agitation
Gently scrub the "shoulders" of the pins where the docking station makes the most mechanical contact using a fresh swab.
Step 4: The Isopropyl Alcohol (IPA) Rinse
This step is vital for removing acidic residue. Use 90%+ Isopropyl Alcohol. IPA is azeotropic, meaning it displaces water and evaporates rapidly, helping to ensure no reactive residues remain to corrode the pins later.
Step 5: Final Drying and Verification
Wipe with a lint-free cloth and re-test resistance. You should now see a stable, low-ohm reading.
Scenario Modeling: Maintenance vs. Recovery
| Parameter | Routine Maintenance | Heavy Scale Recovery | Rationale (Internal Heuristic) |
|---|---|---|---|
| Vinegar Concentration | 10% (Gentle) | 50% (Standard) | Scale thickness vs. plating safety |
| Dwell Time | 30 Seconds | 180 Seconds | Chemical reaction time required |
| Brush Stiffness | Ultra-Soft | Medium-Nylon | Mechanical force needed for calcification |
| Post-Clean Rinse | IPA Wipe | IPA Flush | Residue density removal |
Scenario A: The Proactive Owner In "soft" water areas, a monthly wipe with an IPA-dampened cloth is typically sufficient to help prevent the calcium "bridge" from forming.
Scenario B: The "Hard Water" Recovery In regions with high calcium hardness (>400 ppm), scale can become petrified. If it persists, do not increase acidity; instead, we recommend repeating the 50/50 application multiple times to slowly layer away the buildup.

The Docking Station: Managing the Stationary Source
The charging base is often the "silent killer" of power flow. Because it sits in the sun, water droplets evaporate quickly, leaving concentrated minerals. Ensure the base is level; a tilted station can cause "arcing," which creates tiny pits in the metal that act as anchors for future scale. For more on harsh environment management, see our guide on Winterizing Your Robotic Cleaner.
Engineering Trust through Preventive Care
Maintaining your pool equipment is about protecting a significant investment. As noted in the Fanttik 2026 Internal Industry Report, the longevity of cordless tools is a function of "credibility math"—the systematic removal of friction points like corrosion.
High resistance at the contacts can cause the charger to "pulse," which may lead to cell imbalance in the lithium-ion battery over time. Keeping the path of least resistance clear is an effective way to support battery health.
Safety and Compliance Considerations
- Warranty: Most manufacturers use vacuum-sealed housings aligned with ISO 9001 standards. Breaking these seals typically voids your warranty.
- Battery Stability: Per IATA Guidance, clean contacts allow the Battery Management System (BMS) to accurately read voltage, which is essential for preventing over-discharge.
- IP Ratings: The IP68 rating (per IEC 60529) applies to the housing, not the external pins, which are designed to be "sacrificial" and require regular cleaning.
Establishing a Seasonal Routine
- Weekly: Visual inspection of pins and base.
- Monthly: A 60-second wipe-down with 91% IPA.
- End of Season: Deep clean using 50/50 vinegar, followed by a thorough IPA rinse before storage. Find more details in our Off-Season Care Resource.
Disclaimer: This article is for informational purposes only and does not constitute professional repair advice. Always refer to your product manual. Ensure all equipment is disconnected from power before cleaning.
References
- [Regulatory] EU General Product Safety Regulation (EU) 2023/988
- [Brand/Internal Report] Fanttik 2026 Modern Essential Gear Industry Report (Internal Whitepaper)
- [Technical Standard] IATA Lithium Battery Guidance
- [Technical/Encyclopedia] Isopropyl Alcohol Properties - Wikipedia
Continue reading
 Evaluating the ROI of Seasonal Battery Reconditioning Services
A guide evaluating the ROI of battery reconditioning for pressure washers and trimmers, including the 60% Rule, safety...
Evaluating the ROI of Seasonal Battery Reconditioning Services
A guide evaluating the ROI of battery reconditioning for pressure washers and trimmers, including the 60% Rule, safety...
 Fixed vs. Swappable: Comparing Battery Maintenance for Washers
A guide to battery maintenance for cordless washers, covering cleaning protocols, seasonal storage, and long-term cost analysis for...
Fixed vs. Swappable: Comparing Battery Maintenance for Washers
A guide to battery maintenance for cordless washers, covering cleaning protocols, seasonal storage, and long-term cost analysis for...


Leave a comment
This site is protected by hCaptcha and the hCaptcha Privacy Policy and Terms of Service apply.