


To use a Fanttik tire inflator, connect it to the valve, choose the tire mode, set the cold PSI shown on the vehicle placard, and press Start; the inflator stops automatically at the target. The steps below cover the X8 APEX and X9 Pro controls. For model specifications and PDF downloads, use the Fanttik manual hub; for a unit that will not run, use the tire inflator troubleshooting guide.
Quick Spec Sheet
| Feature | X8 APEX | X9 Pro |
|---|---|---|
| Max pressure | 150 PSI | 150 PSI |
| Airflow | 32 L/min | 17 L/min |
| Battery | 7800 mAh (cordless) | 2 × 2000 mAh (cordless) |
| Continuous runtime | Up to 40 min | Up to 23 min |
| Inflation modes | 4 preset + custom (3–150 PSI) | 4 preset + custom (3–150 PSI) |
| Auto-stop | Yes — stops at target PSI | Yes — stops at target PSI; hose also auto-shuts off 3 min after disconnect |
| Display | LCD dual screen (real-time + target) | LED pressure display |
| Charging port | USB-C | USB-C |
| Power bank output | Yes | No |
| Pressure units | PSI / BAR / KPA / KG/CM² | PSI / BAR |
Where to Find Your Target PSI
Before touching the inflator, confirm the correct pressure for your tire. Do not use the number molded into the tire sidewall — that is the maximum safe pressure for the tire casing, not the recommended inflation pressure for your vehicle. The correct figure is on the sticker inside the driver-side door jamb, in the owner's manual, or in your vehicle's fuel-door panel. Passenger car tires typically fall between 30 and 36 PSI; motorcycles, EV tires, and off-road tires vary widely, so always check the sticker for your specific vehicle.
Step-by-Step: Using the X8 APEX
- Check battery level. Press the power button briefly. The LCD will show the current charge. The X8 APEX has a 7800 mAh battery and supports up to 40 minutes of continuous run time — enough for multiple tires in one session.
- Select a nozzle adapter. The package includes a Schrader (standard car/bike) adapter already attached, a Presta valve adapter for road bikes, and a needle adapter for balls. Attach the correct one for your tire valve type.
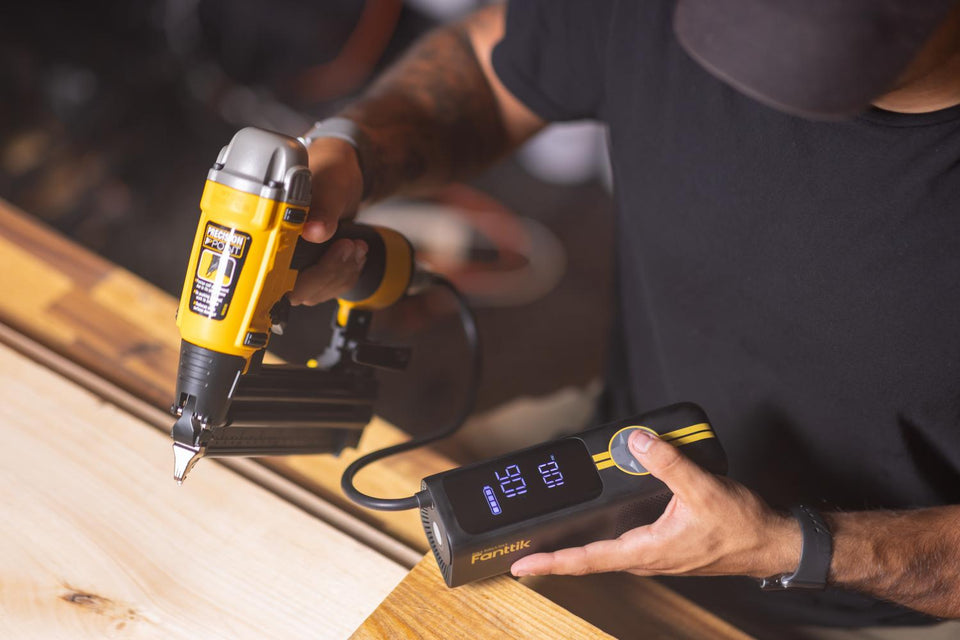
- Press and hold the power button for 1.5 seconds to power on. The LCD dual screen will light up showing real-time pressure and the preset target.
- Set your target PSI. Press the mode button to cycle through the four preset modes (bicycle, motorcycle, car, ball) or hold mode to enter custom mode. In custom mode, use the up/down buttons to dial in any pressure from 3 to 150 PSI. The right-hand screen shows your target; the left shows live tire pressure once connected.
- Connect to the valve. Thread the hose connector clockwise onto the Schrader valve stem until snug. Do not overtighten — fingertight is enough. A brief hiss when connecting is normal; it stops once the connector seats.
- Press the power button once to start inflation. Watch the real-time PSI on the left display climb toward your target on the right.
- Let auto-stop do the work. The inflator cuts off automatically when the tire reaches your set pressure. You do not need to monitor it closely.
- Disconnect the hose. Unscrew counterclockwise. A brief pressure drop of 1–2 PSI when you remove the hose is normal; the connector releases a small amount of air trapped in the hose.
- Power off. Press and hold the power button for 1.5 seconds. The unit will also auto-off after a period of inactivity.
Step-by-Step: Using the X9 Pro
- Check battery level. The battery indicator on the bottom of the unit shows remaining charge via color. The X9 Pro carries 2 × 2000 mAh cells and runs up to 23 minutes continuously.
- Select a nozzle adapter. The package includes an air tube, a Presta valve adapter, and a needle adapter. Confirm the right one is fitted.
- Pull the hose out of its storage panel. The X9 Pro uses a smart ON/OFF hose: pulling the hose out of the panel automatically activates the unit. You do not need to press a separate power button to start.
- Set your target pressure. Use the mode button to choose a preset (bicycle, motorcycle, car, ball) or enter custom mode for any pressure from 3 to 150 PSI. To switch between PSI and BAR, hold the mode button for 2–3 seconds.
- Connect to the valve. Screw the connector onto the valve stem clockwise until snug. The X9 Pro will begin inflating once it detects the connection.
- Let auto-stop do the work. Inflation stops automatically at your target PSI. The unit also auto-shuts off 3 minutes after the hose is disconnected from a tire, preventing accidental over-inflation if you step away.
- Disconnect and stow the hose. Unscrew the connector and press the hose back into its storage panel. Returning the hose to the panel powers the unit down.
Deflating a Tire
Both models include a deflate function. On the X8 APEX, enter custom mode and set your target to a pressure lower than the current tire pressure, then press start — the unit switches to deflation mode automatically. On the X9 Pro, the same logic applies: set a target below current pressure and let the unit regulate down to it. This is most useful for dropping MTB or off-road tires from road pressure to trail pressure without guessing.
Nozzle Adapters — Which One for What
- Schrader adapter (pre-attached) — standard for car tires, SUVs, motorcycles, and most bike tubes. If you are inflating a car tire, this is the one you want.
- Presta valve adapter — narrow threaded valves found on road bikes and some mountain bikes. Unscrew the small brass nut on the valve stem before attaching.
- Needle adapter — sports balls, inflatable pool toys, and air mattresses. Insert into the inflation port; do not push all the way in or you risk tearing the rubber bladder.
Charging the Inflator
Both models charge via USB-C. Use a charger rated at 5 V / 3 A or higher for the X8 APEX; a full charge from empty takes approximately 2 to 2.5 hours. The X9 Pro also charges via USB-C — a fast-charge compatible brick speeds up the cycle. Charge before any extended trip; the X8 APEX's larger 7800 mAh battery handles multiple full-size car tires per charge, while the X9 Pro's 23-minute runtime is well-matched to topping off one to two car tires or a full motorcycle session.
Operating Temperature
Both units are rated for use between −10 °C and 45 °C (14 °F to 113 °F). In cold weather, battery capacity is reduced — charge fully before heading out in winter. Store in a dry location; avoid leaving either unit in a hot car trunk for extended periods.
FAQ
Q: The PSI drops by 1–2 when I disconnect the hose. Is that a problem?
A: No. That is the small amount of air trapped in the hose escaping when you unscrew the connector. It is normal and expected.
Q: How do I know what PSI to set?
A: Check the sticker inside your driver-side door jamb — not the sidewall of the tire. The door sticker lists the correct cold inflation pressure for your specific vehicle load rating.
Q: Can I run the inflator while the engine is running?
A: Fanttik recommends turning the ignition off when inflating car tires. This avoids any interference and keeps the area around the valve stem clear of moving belts.
Q: The X9 Pro turned on when I pulled the hose — is that normal?
A: Yes. The smart hose design activates the unit the moment you pull the hose from its storage slot. Pressing a power button is not required.
Q: Can the X8 APEX charge my phone?
A: Yes. The X8 APEX has a built-in power bank output. The X9 Pro does not have this function.
Q: My inflator is warm after use — is something wrong?
A: A warm unit after inflating two or more tires back-to-back is normal. Both models have built-in heat dissipation. If the unit gets too hot to touch or shuts off unexpectedly, let it cool for 10–15 minutes before continuing.
Related Support
- Fanttik X8 APEX Troubleshooting Guide — full issue index, spec table, and warranty path for the X8 APEX
- Fanttik X9 Pro Troubleshooting Guide — full issue index, spec table, and warranty path for the X9 Pro
- X8 APEX product page
- X9 Pro product page
- Fanttik Support Center
Continue reading
 Fanttik User Manuals: Find Any Product Manual (PDF)
Lost your Fanttik manual? Find the right manual by model number, product category, or support hub, plus PDF...
Portable Tire Inflator Not Working: Fanttik Fix
Fanttik X8 APEX or X9 Pro not inflating? Fix valve seal, auto-stop misread, battery drain, and thermal cutoff...
Fanttik User Manuals: Find Any Product Manual (PDF)
Lost your Fanttik manual? Find the right manual by model number, product category, or support hub, plus PDF...
Portable Tire Inflator Not Working: Fanttik Fix
Fanttik X8 APEX or X9 Pro not inflating? Fix valve seal, auto-stop misread, battery drain, and thermal cutoff...
Leave a comment
This site is protected by hCaptcha and the hCaptcha Privacy Policy and Terms of Service apply.