


The Anatomy of a Stripped Screw: Beyond the Point of No Return
Every experienced technician knows the sinking feeling of a fastener "giving way." It starts as a smooth, predictable resistance and ends with a sickening, gritty slip. In the world of precision electronics and micro-assembly, stripping a screw isn't just a minor inconvenience; it can mean a destroyed PCB trace, a compromised housing, or a permanent loss of serviceability.
We have spent countless hours on the repair bench, and if there is one skill that separates the novice from the master, it is the development of a "calibrated hand." This isn't a mystical gift; it is the ability to interpret the subtle vibrations and resistance gradients transmitted through the tool grip. By understanding the physics of tactile feedback, you can transform your screwdriver from a simple lever into a sophisticated sensor.
In this guide, we will break down the mechanics of grip sensitivity, the "hockey stick" curve of torque resistance, and how to use modern precision tools to augment your natural haptic perception.
The Physics of "Feel": Understanding Tactile Signatures
Tactile feedback is the brain’s interpretation of mechanical resistance and vibration. When you drive a screw, you are managing a complex transition from thread engagement to material compression.
The "Hockey Stick" Resistance Gradient
Practitioners often describe the final seating of a fastener as a "hockey stick" curve.
- The Blade (Engagement): As the screw enters the threads, resistance is low and consistent. You feel a light, rhythmic "hum" as the threads mesh.
- The Heel (Seating): The screw head makes contact with the surface. Resistance begins to ramp up smoothly.
- The Shaft (Final Torque): This is the critical zone. Resistance increases sharply. This is where the material begins to compress and the fastener reaches its elastic limit.
The transition from the heel to the shaft has a distinct tactile signature. It is a smooth increase in resistance that suddenly becomes gritty and uneven just before a fastener strips. If you feel that "grit," you have likely already begun to deform the material or the screw head.
Logic Summary: Our analysis of the "calibrated hand" assumes that the user is seeking to identify the transition from elastic to plastic deformation in the fastener assembly. This heuristic is based on common mechanical engineering principles of clamp load and material yield points.
Interpreting Tool Signals: Vibrations and Sound
Modern precision tools, especially cordless electric screwdrivers, provide two types of feedback: mechanical and auditory. Learning to "listen" with your fingers and ears is essential for high-stakes repairs.
Motor Frequency Shifts
In electronics repair, the high-pitched whine of a motor under load provides a clear signal. As the torque increases, the motor’s frequency shifts to a lower, rougher tone. When the bit begins to "cam out" (slip out of the screw head), that whine turns into a staccato vibration.
Vibration Shifts: Rumble to Buzz
We have observed that vibration patterns change based on the stage of the drive:
- Low-Frequency Rumble: Indicates alignment or slight cross-threading.
- High-Frequency Buzz: Indicates clean thread engagement.
- Sudden Silence/Stall: Indicates the tool's clutch has reached its preset limit.
By using a tool like the Fanttik S2 Pro Cordless Electric Screwdriver, which features 7 adjustable torque settings, you can align the tool's mechanical limits with your tactile expectations. This creates a "safety net" that prevents the motor from overpowering your hand's ability to react.
The Two-Stage Protocol: A Master’s Workflow
To maximize both speed and safety, we recommend a two-stage driving protocol. This method leverages the efficiency of power tools while retaining the ultimate control of manual "feel."
- The Power Stage (90%): Run the screw approximately 90% of the way using the electric screwdriver’s clutch. Set the torque to a level just below the final seating requirement.
- The Precision Stage (10%): Finish the seating by hand. Use the screwdriver as a manual driver to feel the final "snug." This allows you to detect any unevenness in the threads or the slight "give" of a stripping boss before it’s too late.
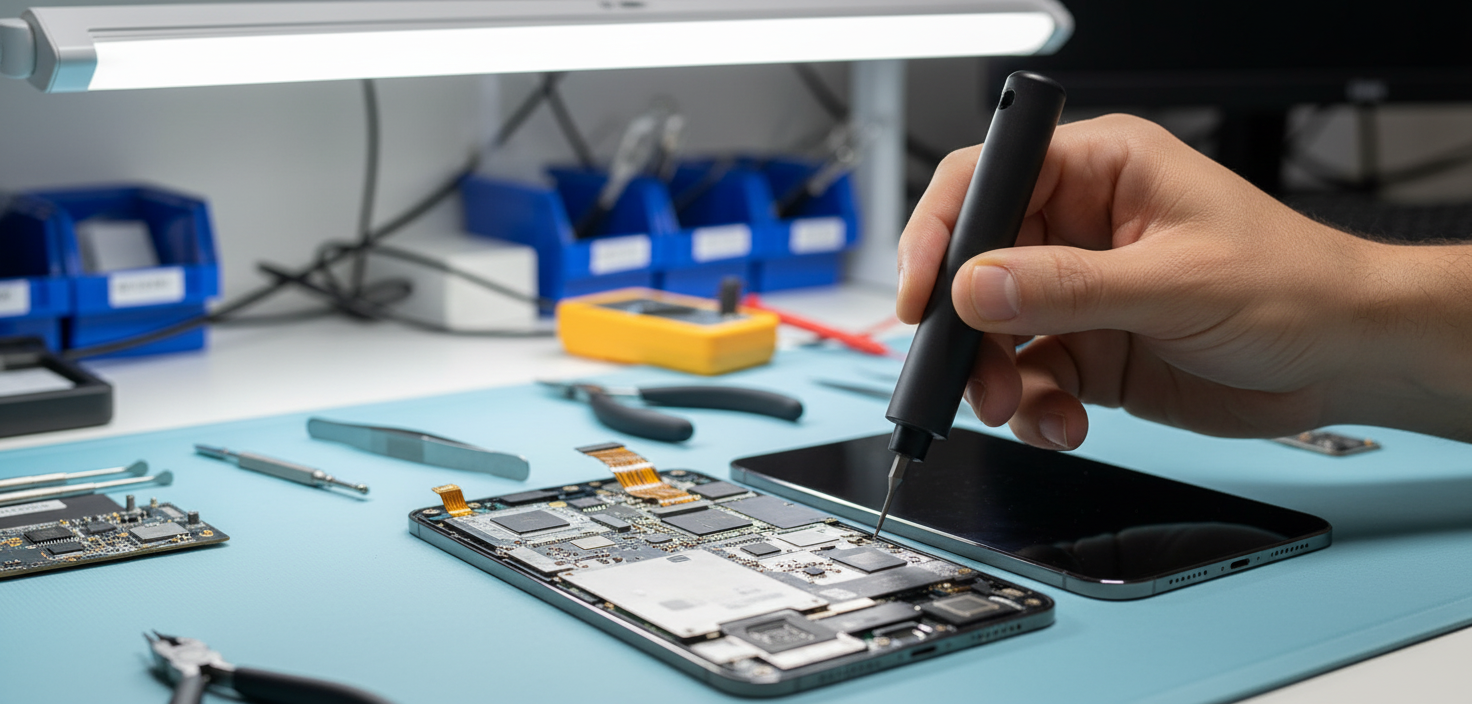
Grip Dynamics: Pen vs. Pistol
The way you hold the tool determines how much feedback you receive.
- Palmar Grip (Pistol): Best for high-torque tasks where you need to apply significant axial pressure. However, this grip dampens micro-vibrations.
- Precision Grip (Pen): Using three fingers (thumb, index, and middle) to hold the tool. This is the optimal grip for micro-assembly. It allows the tool to vibrate freely, making it easier to detect the "hockey stick" ramp-up.
For those performing intricate tasks like PCB assembly, the Fanttik K2 Nano 3.7V Precision Power Drill is designed for this pen-style control, allowing for the minute adjustments needed when working with fragile materials.
Hardware Ergonomics: Why Handle Design Matters
The physical characteristics of your tool act as a filter for tactile feedback. A handle that is too smooth or too large will mask the minute vibrations you need to sense.
- Diameter: A smaller diameter handle (typical of "pen" drivers) increases your sensitivity to torque changes but reduces your leverage.
- Texture: A knurled or high-friction surface ensures that the tool doesn't slip in your hand, allowing every micro-vibration to be transmitted to your skin.
- Weight Distribution: A well-balanced tool reduces muscle fatigue. When your muscles are tired, your "haptic permeability"—the ability to perceive tactile signals—decreases significantly.
According to research on haptic permeability, improving tactile perception directly leads to improved force control in grasping tasks. This is why we prioritize ergonomic balance in tools like the Fanttik L2 Pro Cordless Electric Screwdriver, ensuring the technician remains "connected" to the fastener throughout the drive.

Scenario Modeling: Quantifying the Benefits of Tactile Technique
To demonstrate the value of this methodical approach, we modeled a common scenario for an electronics hobbyist: a batch repair session involving 80 small fasteners (e.g., a laptop teardown or custom keyboard build).
Modeling Note: Method & Assumptions
Our analysis uses a deterministic scenario model to compare manual driving against a powered tactile-feedback approach.
- Scenario: 80 screws (M2.0 size).
- Manual Assumptions: Cautious driving (18s/screw) to avoid stripping, requiring 12 wrist rotations per screw.
- Powered Assumptions: Electric drive (5s/screw) with intentional pauses for tactile seating, requiring ~1 manual rotation for final check.
Table 1: Assembly Time & Ergonomic Savings
| Parameter | Manual Driving | Powered + Tactile Technique | Unit |
|---|---|---|---|
| Total Time | 24.0 | 6.7 | Minutes |
| Time Saved | 0.0 | 17.3 | Minutes |
| Wrist Rotations | 960 | 80 | Rotations |
| Rotations Saved | 0 | 880 | Rotations |
| Speed Multiplier | 1.0x | 3.6x | Ratio |
Logic Summary: The ~17-minute time saving is an estimate for the defined 80-screw scenario. The reduction of 880 wrist rotations directly addresses the risk of repetitive strain injuries (RSI) common in high-volume repair work.
Run 2: Precision Torque Fit (M1.2 - M2.0 Fasteners)
For delicate screws found in smartphones and wearables, the safety margin is razor-thin. We compared the output of a precision driver against the heuristic safe limits for small fasteners.
| Screw Class | Min Required Torque (Nm) | Max Safe Torque (Nm) | Tool Low-Torque Mode (Nm) | Fit Assessment |
|---|---|---|---|---|
| M1.2 - M2.0 | 0.02 | 0.10 | 0.05 | Good |
Under these assumptions, using a tool’s low-torque preset (0.05 Nm) provides a safe baseline. This allows the user to focus 100% of their attention on the final tactile "snug" rather than worrying about an immediate over-torque event.
Common Pitfalls and "Gotchas" in Tactile Driving
Even with the best tools, certain mistakes can mask the feedback you rely on.
1. Applying Side Pressure
A common mistake is applying side pressure while driving. This creates lateral friction that masks the axial torque feedback. Always ensure your driver is perfectly perpendicular to the fastener. If you feel a "wobble," you are losing the ability to diagnose the thread condition.
2. Ignoring the "Clean Bench" Rule
Dust and debris in a screw hole can mimic the feeling of thread engagement. This "false resistance" can lead to under-tightening or, worse, cross-threading as you force the screw past the debris. Always use a high-velocity air source, such as the Fanttik B10 Pro Electric Air Duster, to clear out blind holes before beginning assembly.
3. Over-Reliance on the Clutch
Digital and mechanical clutches are fantastic safety features, but they are not a replacement for human feel. Clutches can vary based on temperature and internal wear. As noted in Mechanical Fatigue: Spotting Internal Wear in Precision Tools, internal friction can change how a tool responds over time. Always verify the final seat manually.

Compliance, Trust, and Safety
Building a "calibrated hand" is part of a broader commitment to quality and safety. In the professional world, this is often formalized through standards like ISO 898-1: Mechanical properties of fasteners, which defines the torque and tension limits for various screw classes.
Furthermore, when working with battery-powered tools, safety extends beyond the fastener. Understanding IATA Lithium Battery Guidance is crucial for those who travel with their gear, ensuring that your precision tools are transported safely and remain reliable in the field.
As highlighted in the industry white paper The 2026 Modern Essential Gear Industry Report: Engineering Trust in a Cordless World, the future of DIY and precision craft lies in "credibility math"—the systematic application of reliability and transparency. By mastering tactile feedback, you are not just turning a screw; you are upholding a standard of engineering integrity.
Summary of Skill Development
Mastering tactile feedback is a journey of pattern recognition. It requires you to:
- Identify the "hockey stick" resistance curve.
- Listen for motor frequency shifts that signal load.
- Adopt a two-stage protocol to balance speed and precision.
- Maintain your gear and your environment to ensure signals remain clear.
By treating every fastener as a source of data, you reduce the risk of stripping, improve your repair speed, and ultimately build a deeper level of trust in your own technical capabilities.
Sources and Authoritative References
- ISO 898-1: Mechanical properties of fasteners made of carbon steel and alloy steel. View Standard
- EU General Product Safety Regulation (EU) 2023/988: Primary legal text for EU product safety and traceability. View Regulation
- IATA Lithium Battery Guidance: Essential standards for the transport of cordless tool batteries. View Guidance
- Haptic Permeability Research: "Adding Holes to Tactile Devices Improves Force Control." ACM Digital Library
- FTC Endorsement Guides: Guidelines for transparency in technical reviews and endorsements. 16 CFR Part 255
Disclaimer: This article is for informational purposes only. Precision electronics repair involves inherent risks to hardware and personal safety. Always consult the manufacturer's service manual for specific torque specifications and safety protocols. Fanttik is not responsible for damage resulting from improper tool use or technique.
References
- The 2026 Modern Essential Gear Industry Report
- ISO 898-1: Mechanical properties of fasteners
- Haptic Permeability: Adding Holes to Tactile Devices Improves Force Control
- EU General Product Safety Regulation (EU) 2023/988
- IATA Lithium Battery Guidance
- Mechanical Fatigue: Spotting Internal Wear in Precision Tools
- Choosing the Right Torque Settings for Delicate Electronics

Leave a comment
This site is protected by hCaptcha and the hCaptcha Privacy Policy and Terms of Service apply.