








































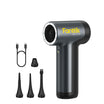



Carry your charged electric pump plus the supplies that actually fix the flat: tire levers, tube-repair patches if you run tubes, and any backup your tire setup and wheel hardware call for. The pump only puts pressure back after the repair. It can't find the puncture, seal it, or get the tire off the rim.
That makes a good electric bike flat kit a small core of repair basics. Add a spare tube, a tubeless fallback, or a wheel wrench only when your bike needs one.
Start With a Pump, Tire Levers, and a Patch Kit
A long-standing bicycle repair guide lists a pump that fits your valves, tire levers, and a patch kit as the bare minimum for fixing a flat. Each item handles a different step of the repair:

- Electric pump with a fitting valve head or adapter: refills the tire once the hole is sealed. Charge it before you leave.
- Tire levers: pry the tire bead off the rim so you can reach the tube and find the hole.
- Patch kit: seals a hole in an inner tube so it holds air again.
The order matters. Levers open the tire, the patch fixes the hole, and the pump comes last. If you pump first, the new air leaks out through the same hole, and your battery gets used up without fixing anything.

This core list serves as a practical baseline from general bicycle repair. What you actually need depends on your specific tire type, wheel hardware, and bike setup. The next two sections cover what to add on top.
Choose Repair Supplies for Tube or Tubeless Tires
What you add beyond the basics depends on whether your tires use inner tubes or tubeless sealant. Pick the backup that matches your setup instead of packing one generic kit.
If Your Tire Uses an Inner Tube
Your patch kit already covers the basic tube repair. A spare tube is an optional upgrade for speed. The same guide notes that a spare tube can speed replacement when wheel removal is easy, because swapping in a new tube beats patching the old one by the roadside.
That shortcut depends on the wheel. If your rear wheel is slow or awkward to remove, a spare tube saves less time, and the patch kit stays your main repair. If you do carry a tube, match it to your tire size and valve type. Keep the patches in the kit too, so a second puncture on the same ride doesn't leave you stuck.
If Your Tire Is Tubeless
Tubeless tires have no inner tube. Liquid sealant inside the tire is meant to close punctures. The backup plan is for the moment that sealant can't handle. For a leak that sealant doesn't stop, the tubeless guide advises carrying a tube and the tools to remove the tubeless valve.
Here's why both pieces matter. The tubeless valve has to come out of the rim so the tube's own valve can go through the same hole. Without a valve-removal tool, the spare tube is just extra weight in your bag. Once the tube is in, your electric pump inflates it like any tubed tire.
This fallback is for a sealant failure. It is your last resort if sealant can't close the hole. Like the spare tube above, it means removing the wheel, so check the hardware next.
Check Valve and Wheel-Hardware Fit Before You Ride
Your kit only works if the pump fits your valve and you can get the wheel off when your repair plan needs it. Run this check at home, where a missing tool costs nothing:
- Match the pump to your valve. Check whether your tires use Presta valves (thin, with a small locknut) or Schrader valves (the wider car-style type). Connect the pump at home and confirm it fills the tire without hissing at the head. If air escapes at the head, troubleshoot a leaking Presta connection before you count on it roadside.
- Decide whether your plan needs the wheel off. Swapping in a spare tube or installing a tube on a tubeless setup requires removing the wheel from the frame.
- Identify your wheel hardware and its tool. The repair guide points out that wrench needs depend on axle and wheel-retention hardware. Wheels held on by nuts need a small adjustable wrench. Anti-theft retention systems need their own special wrench.
- Check for model-specific removal steps. If your e-bike's wheel has extra steps to come off, follow your bike's manual for that wheel. Don't assume a generic wrench will do the job.
If any step fails, fix it before the ride. Change the pump adapter, add the right wrench, or plan to rely on patching. If all four check out, your kit is ready.
FAQs
How much charge should my electric pump have before a ride?
Leave with a full charge. The pump comes last in the repair, so a dead battery stops you even after the hole is fixed. A battery capacity listed in mAh isn't the same as how many tires the pump can fill. Check your pump's charge indicator, and look up its rated runtime in the manual.
What PSI should I inflate to after the repair?
Inflate to the recommended pressure for your tire. It's usually printed on the sidewall or listed by your bike maker. Your pump's maximum PSI is only the most it can produce. It's not a target. If your pump lets you set a preset pressure, set it to the tire's recommended number before you start.
What if air leaks from the valve itself instead of the tire?
A leak at the valve may not be a puncture. On a Schrader valve, a loose core can let air out. You can tighten a leaking Schrader core with a core tool, or replace the core. Fix it before you inflate, or the tire will keep losing pressure no matter how often you top it up.
Continue reading
 How to Dry a Tent Indoors After a Wet Camping Trip
A step-by-step guide to air-drying a wet tent at home, with a limited-space option, a fold-by-fold dryness check,...
 Handheld Vacuum or Full-Size Vacuum for Upholstery? Match the Tool to the Job
Handhelds suit quick dry pickup on sofas and chairs; full-size vacuums suit longer passes. Compare the upholstery tool,...
Leave a comment
This site is protected by hCaptcha and the hCaptcha Privacy Policy and Terms of Service apply.