










































Choosing a backpacking tent starts with your trip, not the lightest number on a spec sheet. Define your occupant count, route exposure, and expected weather first, then compare the complete carried weight, usable interior space, and documented weather protection of each shelter on the same terms.
The goal is a tent whose real strengths match your route, not the tent with the smallest headline weight or the biggest capacity label.
Key Takeaways
- Build a one-line trip profile (occupants, duration, exposure, weather) before comparing any tent specs.
- Compare trail-style and packaged weight using the same component list, then add anything extra you plan to carry.
- Read capacity alongside floor dimensions, peak height, wall shape, and vestibules to judge real livability.
- Treat a season label as one input; verify the fly, floor, seams, ventilation, and setup method against your route.
- Let the priority order shift by scenario: solo minimalist, shared, long-distance, or exposed-route trips each favor a different tradeoff.
Start With the Trip You Need the Tent to Handle
Before you compare a single spec sheet, decide what the trip actually demands from the shelter. That decision tells you whether to lead with carried weight, usable space, setup structure, or weather protection.
Write a one-line trip profile
Sketch these three inputs before you shop:
- Occupant count and whether gear and shelter weight will be shared
- Trip duration, mileage, and how sensitive you are to packed volume
- Expected rain, wind, cold, exposure, and the kind of ground you'll be pitching on
Set the non-negotiables first
A tent has to meet your route's documented weather and setup needs before weight savings matter at all. If the forecast calls for sustained wind and rain, that requirement outranks shaving a few ounces. Preferences like extra sitting room or a slightly lighter pack come after the non-negotiables are settled, not before. This step doesn't name a winning tent yet; it gives you a short list of characteristics every candidate must have.
Compare Trail Weight and Packed Weight on the Same Basis
Tent weight numbers aren't automatically comparable. Two figures with the same label can include different components, so check what each manufacturer counted before you put two tents side by side.
Separate the weight categories
| Weight label | What it may include | How to use it |
|---|---|---|
| Minimum or trail-style weight | Body, rainfly, and poles only | Compare only against another tent's minimum figure, never against a packaged figure |
| Packaged weight | Body, fly, poles, stakes, stuff sack, instructions | Closer to what ships in the box; still may exclude a footprint |
| Actual trip weight | Packaged weight plus anything extra you'll carry | The number that should decide your pack weight, including a footprint if you use one |
This breakdown reflects how outdoor gear guides commonly define minimum and packaged tent weight, but the manufacturer's own definition still controls, so confirm it on the product page or manual before comparing models.

Normalize the comparison before choosing
Hold every tent in your shortlist to the same component boundary. If one listing shows a bare minimum weight and another shows a packaged weight, you're not actually comparing like with like. A low minimum figure is not the weight of the complete shelter system you'll carry on trail, and treating it that way is the fastest way to end up heavier than you planned once stakes, a stuff sack, and a footprint are added in.
Judge Interior Space by Dimensions and Pole Geometry
A capacity label tells you the intended occupant count, not whether the space will actually work for you. Floor dimensions, height, wall shape, and pole geometry decide real livability.
Read capacity with the floor plan
Start with floor length, width, and taper rather than the capacity number alone. A floor that narrows sharply at the foot end, or walls that slope in heavily, can make a "two-person" tent feel tight for two adults and their gear, even though the label technically fits.
Use height, walls, vestibules, and poles to judge livability
Four checks turn a spec sheet into a livability decision:
- Peak height marks the tallest single point inside the tent, not standing room throughout the interior.
- Wall angle matters because more vertical walls tend to preserve usable sitting space, while heavy taper shrinks it even at the same peak height.
- Vestibules keep packs and boots out of the sleeping area, which matters most on wet or muddy trips.
- Pole geometry shapes both the interior volume and how the tent gets set up; freestanding designs pitch without staking while non-freestanding and trekking-pole tents rely on correct staking and tensioning for their shape and stability.
Comparing all of these together, rather than the capacity label by itself, gives a realistic read on the tent's true interior volume.
Match Weather Protection to the Route
A season rating is a starting point, not a guarantee. Check the tent's actual fly coverage, floor construction, ventilation, and setup requirements against your specific route and forecast before you rely on it.
Verify the rain and moisture system
Look at three grouped features rather than one label:
- Fly coverage and floor construction: a rainfly that reaches close to the ground with a raised, seam-taped floor is intended to keep out sustained rain and splash-up; a partial-coverage fly is not.
- Seam treatment: taped seams reduce the chance of water working through stitch lines, but taping quality and coverage vary by model, so check the product documentation rather than assuming it from the season label.
- Ventilation: mesh panels and deployable vents manage interior condensation and airflow; they solve a moisture-buildup problem, not a rain-exposure problem, so don't substitute one for the other.
Check structure and setup limits
Confirm the pole configuration, the number and placement of guy-out points, and how dependent the tent is on staking before you commit to a route. If your route may bring exposed, windy, or otherwise severe conditions and the manufacturer's documented weather, wind, or setup scope doesn't clearly cover that exposure, don't rely on that tent for the trip. Choose a shelter with documentation that matches the conditions, or adjust the route. Hikers should prepare for sudden weather changes on trail by carrying season-appropriate shelter and insulation regardless of forecast.
Use the Weight–Space–Protection Tradeoff to Choose by Scenario
There's no single tent that wins every trip. The right tradeoff between weight, space, and protection changes with the scenario you're actually packing for.
For solo minimalist trips
Lead with the complete carried weight and packed volume once you've confirmed the weight figures are on the same basis. Still reject any shelter that saves weight by cutting the sleeping, sitting, or gear-storage space your solo trip actually requires; a tent that's technically light but unusable on the ground defeats the purpose.
For shared and more exposed trips
On a two-person trip, evaluate livability and the divided complete shelter weight together rather than trusting the capacity label alone; a cramped "two-person" tent doesn't get more livable just because the weight splits between two packs. On routes with real exposure to wind, cold, or unsettled weather, let the documented structure and weather scope outrank a small weight saving. Long-distance trips sit in between: weigh packed volume and repeated daily setup against the comfort you need to sustain the mileage.
Run the Final Specification Check Before You Select
Before you commit to a tent, run this sequence against your specific route and shortlist:

- Confirm your trip profile: occupant count, duration, exposure, and expected weather.
- Record each candidate's weight using the same component basis, then add any extras you'll carry, such as a footprint.
- Check floor dimensions, peak height, wall angle, and vestibules against the space you actually need.
- Confirm the pole geometry and setup method match the ground and conditions you'll be pitching in.
- Verify the documented fly coverage, floor and seam construction, ventilation, and weather scope against your route and forecast; if a needed limit isn't documented, treat that gap as unresolved rather than assuming the tent covers it.
A tent that passes all five checks for your specific trip is a reasonable choice for that trip. A tent that fails one, especially the weather-scope check on an exposed route, should stay on the shelf until you find one with matching documentation.
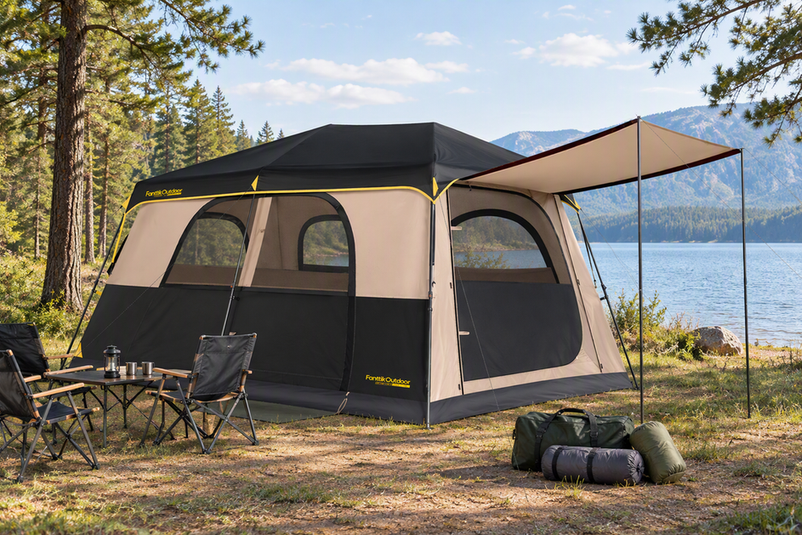
If your plans lean toward car camping rather than trail backpacking, note that quick-pitch family tents follow a different set of priorities. For vehicle-accessible campsites, our family camping tent prioritizes rapid cabin setup and interior standing height over trail weight. If you're assembling gear for a vehicle-supported campsite instead, our camping supply collection provides general campground gear, while instant tent options illustrate how integrated framing trades carried volume for setup speed.
FAQs
Does a tent footprint count toward the weight I compare?
A footprint is often sold separately and excluded from both minimum and packaged weight figures. If you plan to carry one, add its weight to the packaged figure before comparing that tent against others, since the packaged number alone won't reflect what you'll actually be carrying on trail.
What if a tent has a season rating but no clear weather limit?
Never treat a broad season label as proof a shelter handles severe mountain weather. Evaluate specific construction details like fly coverage, floor waterproofing, and guy-out reinforcements against your forecasted exposure. When documented limits are missing for an exposed route, select a shelter with verified weather ratings rather than relying on a general marketing term.
How should two backpackers divide shelter weight on the trail?
Weigh the entire shelter system with all poles, stakes, and sacks first to find the true carried load. One partner can pack the tent body and stakes while the other carries the rainfly and pole set, keeping each hiker's shared shelter burden balanced and predictable.
Continue reading
 How to Choose a Large Family Camping Tent: Space, Layout, and Setup
A practical walk-through for picking a family-size tent: convert sleepers and gear into floor space, pick a layout,...
What PSI Should Bike Tires Be? A Bicycle Tire Pressure Guide
A practical breakdown of starting bike tire pressure by bike type, tire width, rider weight, tube vs tubeless...
How to Choose a Large Family Camping Tent: Space, Layout, and Setup
A practical walk-through for picking a family-size tent: convert sleepers and gear into floor space, pick a layout,...
What PSI Should Bike Tires Be? A Bicycle Tire Pressure Guide
A practical breakdown of starting bike tire pressure by bike type, tire width, rider weight, tube vs tubeless...



Leave a comment
This site is protected by hCaptcha and the hCaptcha Privacy Policy and Terms of Service apply.