











































A soldering iron is a controlled heat source, not a universal craft tool, so what a soldering iron is used for outside circuit boards splits into four groups: joining metal for stained glass, making simple wood-burning marks, softening identified plastic under narrow conditions, and a small, alloy-dependent slice of jewelry work. Stained-glass joining and basic pyrography are the two uses with solid, bounded support here.
Plastic and jewelry work stay conditional, because the heat delivery and material match matter more than how high the iron's dial can go.
What Can a Soldering Iron Do Outside Circuit Boards?
A soldering iron heats a small tip to a set temperature so you can melt solder, warm a material, or make a controlled mark. For creative hobby crafts and repair jobs, that heat is useful for joining metal in stained glass, marking wood, and, in limited cases, softening identified plastic. It is a poor match for fine wood-burning detail, unidentified plastic, or general jewelry soldering, where a torch or a purpose-built tool is designed for the job.
- Stained glass: works for soldering copper foil or lead came together; it does not bond directly to bare glass.
- Wood burning: makes broad, simple marks; it lacks the tip variety of a dedicated pyrography pen for fine detail.
- Plastic: may soften or fuse a small, identified thermoplastic part, but unknown or structural plastic is not a supported use.
- Jewelry: suited only to narrow, low-heat decorative tasks; alloy, joint size, and method decide whether a torch is required instead.
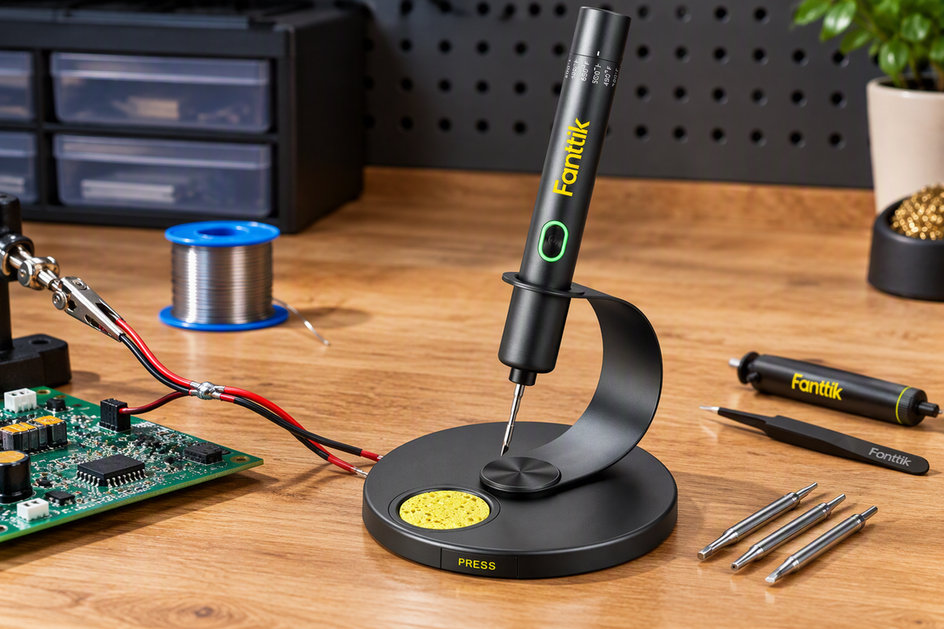
If you are comparing an iron to cover several of these tasks, check the temperature range and available tip geometry before you buy, such as those listed for the Fanttik T1 Max Soldering Iron Kit.

Stained Glass: Join Foil or Came, Not Bare Glass
Solder does not bond to bare glass, so stained-glass work first wraps each piece in copper foil, or uses lead came, to create a metal surface the solder can grip. Flux is brushed onto that surface so the solder flows and bonds cleanly instead of beading up.
One widely used stained-glass technique guide describes heating the iron to around 700°F as a practical example for the solder it covers, though that number belongs to that specific guide and solder, not to stained-glass work in general. Keep the tip moving along the seam rather than resting it in one spot, because concentrated heat in one place can crack the glass under the foil.
The setting that actually works for you still depends on your solder's alloy, the flux, the joint, and how quickly heat leaves the piece. Treat any single number as a starting point to check against your own solder's documentation. If your iron accepts swappable tips, a finer point, like the C210 replacement tips for T1 Max, makes it easier to keep the bead moving without overheating one spot.
Pyrography: Use It for Broad Marks, Not Fine Detail
A soldering iron can burn simple marks into wood, but it will not match a dedicated pyrography pen for fine, detailed work. The iron's tip is shaped for solder joints, not for the range of interchangeable nibs a wood-burning pen uses for shading and thin lines.
A direct comparison of the two tools notes that soldering-iron tips are too large for fine wood-burning detail and offer far fewer tip options than a purpose-built wood-burning pen, which is what limits shading and repeatable texture rather than raw heat output.
Choose the soldering iron already in your kit for broad burns, edges, or simple decorative lines on scrap wood. Switch to a dedicated pyrography pen when the project needs shading, thin controlled lines, or repeatable texture, since that is the control a soldering iron's tip shape was not built to deliver.
Plastic Repair and Sculpting: Only Identified Materials
A soldering iron can sometimes soften or fuse small, identified plastic parts, but this is plastic welding or reshaping, not metal soldering, and it only holds up as a reasonable approach under narrow conditions.
- Identify the plastic before you heat it. Unmarked or coated plastic can react unpredictably, and there is no reliable way to guess a safe setting from appearance alone.
- Keep the job small and non-critical. This is not a fit for structural parts, load-bearing repairs, or anything where a failed fix matters.
- Skip any generic plastic temperature number. Current soldering-iron guidance does not establish a safe range across polymer types, so a number borrowed from an unrelated source is a guess, not a spec.
- Stop if the plastic chars, smokes unexpectedly, or gives off a strong odor. That's a sign to switch to a verified, material-specific repair process instead of continuing with a soldering iron.
For anything bigger than a small cosmetic fix, or plastic you can't identify, a dedicated plastic welder or the original manufacturer's repair process is the safer choice.
Jewelry Making: A Narrow, Material-Dependent Use
Jewelry suitability isn't about whether a soldering iron gets hot enough to melt some metal; it's about whether it can deliver consistent heat across the specific alloy and joint you're working with. That depends on the alloy, the joint size, the solder type, and the soldering method, none of which a single iron temperature setting can answer on its own.
Small, low-heat decorative attachments may be conceptually close to soldering, but standard jewelry soldering typically relies on a torch to heat the whole joint evenly, something a pointed iron tip isn't designed to do. If your project calls for joining rings, bezels, or other jewelry-scale metal joints, a torch-based jewelry soldering setup is the right category, not a soldering iron built for electronics or craft work.
Task-Specific Temperature Guide
Temperature confusion usually comes from mixing up the solder's working requirement with the iron's maximum or displayed setting. The table below separates what's actually supported from what current evidence doesn't establish for each task.
| Task | Supported starting point or status | What the number refers to |
|---|---|---|
| General metal soldering | Set from the solder's own working range, not the iron's maximum dial | Solder melting/flow temperature, distinct from the iron's maximum output |
| Stained glass (copper foil) | ~700°F cited as one source-specific example, not a universal setting | The dial setting used for the solder in that particular guide |
| Pyrography / wood burning | Not established by current evidence | Mark quality depends on tip shape and technique, not one number |
| Plastic repair or sculpting | Not established by current evidence | Depends on the unidentified polymer's softening behavior |
| Jewelry making | Not established by current evidence | Depends on alloy, joint size, and heat-delivery method |
For ordinary soldering, set the iron's dial from the solder you're using rather than maxing it out, and clean residue off the tip with brass wool between joints, an approach confirmed by a university makerspace's soldering iron user guide.
Safety Boundaries for Heat, Fumes, and Flammables
Craft and repair use carries the same soldering hazards as electronics work: burns from the tip, fire risk from nearby materials, and fumes from flux or rosin.
- Never touch the tip or a freshly heated joint; return the iron to its stand instead of laying it on the bench.
- Wear eye protection, since solder can spit while it melts.
- Work on a fire-resistant surface and keep paper, cloth, solvents, and other combustibles clear of the tip.
- Use ventilation or local extraction for flux and rosin fumes, and keep your face out of the rising plume.
- Wash your hands after handling solder, and treat plastic residue as a separate hazard from ordinary solder cleanup.
This university soldering safety guidance on hot tips, stands, eye protection, fire-resistant surfaces, and flux or rosin fumes applies just as much to craft projects as it does to electronics work.

Stop and switch to a different process if you can't control the fumes in your workspace or can't keep the hot iron parked securely away from anything combustible. Those two conditions apply to every task in this article, not just electronics work.
Before heating your iron, match your project to its verified tool boundary: proceed with foil-wrapped stained glass or broad scrap-wood burns, but pause and switch to a plastic welder or jeweler's torch whenever you face unknown plastics or structural metal joints.
FAQs
Can I use the same tip for electronics and wood burning?
Physically, yes, because the tip just transfers heat regardless of the material underneath. In practice, it's worth keeping a separate tip for wood, plastic, or craft work, since residue from those materials can carry over into a clean electronics joint. There isn't a documented contamination threshold to point to, so treat a dedicated tip as a simple precaution rather than a strict rule.
What temperature range is needed for stained glass?
One stained-glass guide's practical example uses roughly 700°F for the solder it discusses, but that number belongs to that specific solder and setup, not to stained-glass work in general. Start from the working temperature listed for your own solder and flux, then adjust for how quickly the joint pulls heat away.
How do I clean a soldering iron tip after plastic repair?
Brass wool is a documented way to remove ordinary solder residue from a tip, but it isn't established as a cleaning method for plastic residue specifically. Clean the tip with your iron manufacturer's approved method, and consider dedicating a separate tip to plastic work if residue keeps building up or the tip surface looks damaged.
Continue reading
 Soldering Iron Chisel vs Conical Tips: Selecting the Right Contact Area for Wire Splices
A technical look at how tip shape changes heat transfer on wire splices, with a decision path for...
Soldering Iron Chisel vs Conical Tips: Selecting the Right Contact Area for Wire Splices
A technical look at how tip shape changes heat transfer on wire splices, with a decision path for...



Leave a comment
This site is protected by hCaptcha and the hCaptcha Privacy Policy and Terms of Service apply.