








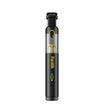
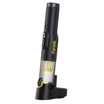
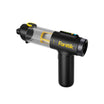
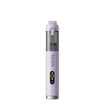
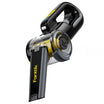
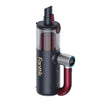
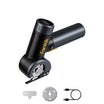
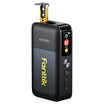
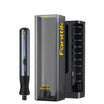
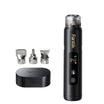


To vacuum a tufted sofa with a handheld vacuum, start by checking the sofa's care directions and looking for loose threads or buttons. Use a soft upholstery brush on the open seat and back. Then make short, light, moving passes beside the buttons and along the seams instead of dragging the nozzle across them.

A narrow crevice tip works only where it fits without being forced. If fabric catches or lifts, or if a button is already loose, stop vacuuming that spot. Done gently, tufted sofa vacuuming clears dry crumbs and dust from the recesses without putting strain on the tufting.
How to Vacuum a Tufted Sofa With a Handheld Vacuum
Check the Care Directions and Inspect the Tufting
Before you turn on the vacuum, take two minutes to learn what the fabric can handle and where it's already weak.
- Find the cleaning code. On a store-bought sofa, the code is usually printed on the tag. Sailrite's guide to upholstery cleaning codes says to check the fabric code first and notes that code-X fabrics should only be vacuumed or lightly brushed. A code X means the fabric can't be cleaned with water or solvent cleaners, so dry vacuuming and light brushing are the main options. If the sofa has been reupholstered, ask the fabric manufacturer.
- Look over every tuft and seam. Homes & Gardens advises that you inspect for loose threads or snags before vacuuming so you don't cause damage you can't undo. Gently press around each button. Watch for frayed thread, fabric that has pulled away, or a button that wobbles.
- Mark any spots to skip. Do not run the attachment over a loose thread or a loose button. Skip those spots and keep them out of your cleaning path.
- Test first if the method is new to you. The same guide recommends that you test a small, inconspicuous area first, such as the back or a lower side panel. If the fabric fuzzes, pills, or pulls up, change your attachment or approach before moving to the front of the sofa.
Choose a Brush for Broad Areas and a Crevice Tip Selectively
The open seat, back, and arms are the easiest parts to clean. For everyday loose dirt, Sailrite recommends the upholstery attachment, and suggests vacuuming under the cushions too. If your seat cushions lift off, remove them and vacuum the area underneath with the same light passes, because crumbs often fall down there. Fabric makers may be more specific. For example, Posh Textiles' code-S care directions call for an upholstery brush attachment to keep up with dirt and dust on that company's code-S fabrics. Your own sofa's directions come first.
Tufted recesses are where crumbs tend to collect. Amerlife's guidance for cleaning between tufts for its tufted sofas calls for a handheld vacuum or upholstery attachment on the surface and crevices, plus a soft brush or brush attachment between the tufts. Its weekly routine covers dust, crumbs, and pet hair, and it says to pay extra attention to tufted areas where debris builds up. That's why a soft brush is a sensible default for the dips around buttons.
Save the crevice tip for seams and gaps that are easy to reach, such as the line where the seat meets the arm. If the tip slides in without pressing on fabric, thread, or a button, you can use it. If you'd have to wedge it into a tight tuft, don't. Go back to the soft brush, or leave that spot alone instead of risking pulled fabric. The handheld vacuum buying guide covers how to match attachments and reach to jobs around the house if you're unsure which tools your vacuum includes.

Make Light, Moving Passes Beside Buttons and Seams
- Keep it moving. Experts quoted by Homes & Gardens say to keep the attachment moving without force. Don't rub hard with a brush or hold it in one place, because that can damage the textile. If your attachment has a built-in beater brush, the same expert suggests letting the brush stir up embedded dust instead of pressing down.
- Go beside the button, not over it. Make a short pass along one side of a secure button, lift the tool, and repeat on the other side. Dragging the nozzle over the top is how a button or its thread can get hooked. This is careful handling advice, not a tested safe distance, so let what you see guide you.
- Follow seams in one easy stroke. Run the brush or tip along the seam line instead of scrubbing back and forth across it.
- Stop if anything catches. If fabric lifts into the nozzle or a thread snags, turn the vacuum off or pull it away right away. Don't let suction tug on the snag. Leave that spot, along with any visibly loose fastener, out of direct contact from then on.
When you're done, the recesses should look clear of crumbs and the tufting should sit just as it did before you started. If you see any new puckering or loose thread, take that as a sign to use a lighter touch next time.
FAQs
Should I start with the lowest suction setting?
If your handheld vacuum has adjustable power, yes. Homes & Gardens advises that you start at the lowest available setting because upholstery is more fragile than carpet, then turn it up only if you need more pull. The guide notes that high suction may seem better for pulling out deep dust, but on upholstery it does more harm than good. Treat this as a starting point, not a fixed setting for every sofa.
Should I clean the vacuum brush before using it on the sofa?
Yes. The same guide says to check the brush for dust or dirt before you use it, so you don't rub that grime into the fabric. Tap the bristles out or pull off any trapped hair before you start.
Which direction should I vacuum upholstery?
If you can see the fabric's weave, follow the direction of the weave. Homes & Gardens relays this tip as a way to remove dust without harming the fibers. If your fabric has no obvious direction, just keep your strokes light and consistent.
Continue reading
 Engraving a Wooden Gift Tag With a Rotary Tool
A step-by-step method for personalizing a small wooden tag with a rotary tool, covering setup, layout, a scrap...
 How to Choose a Pressure Washer for Washing a Car at Home
A pass/fail method for home car washing: match water, power, and reach to the exact model, then check...
Leave a comment
This site is protected by hCaptcha and the hCaptcha Privacy Policy and Terms of Service apply.