








































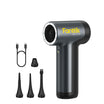



Two bike pumps can show different pressure readings for a few separate reasons. The gauges themselves can disagree, one display may be easier to read precisely than the other, and air moves between the tire and the pump hose when you connect and disconnect. None of these reasons tells you which pump is right, and a finer display is not proof of accuracy on its own.

The practical fix is to stop chasing every small gap and check both pumps the same way, ideally against one independent reference gauge. That shows you which pump tracks the reference more closely at the pressures you actually ride.
How Gauge Display and Hose Pressure Affect Readings
Two things shape the number you see: how the gauge displays pressure, and what happens to the air while the pump head is on the valve. Neither one tells you by itself which pump is more accurate.
Display Resolution and Gauge Readability
Display resolution can explain part of a gap, but it can't tell you which pump is correct. Resolution is the smallest step a gauge shows, such as whole PSI or tenths of a PSI. Accuracy is how close that number is to the real pressure inside the tire. In its guide to mountain bike gauges, MBR says digital gauges can show tenths of a PSI without being any more accurate than analog gauges. For example, a pump showing 31.4 PSI next to one showing 31 PSI is giving you an extra digit, not necessarily a better answer.
Analog dials add a reading problem. The same MBR guide notes that a small dial can make its markings harder to read. It also describes some low-pressure MTB gauges rated only to 35 to 40 PSI, which spread that range across a bigger scale so you can read it more precisely. When a needle sits between two small marks, two riders can read the same gauge differently. That is a reading difference, not evidence that the gauge itself is off.
Chuck Connection and Disconnect Pressure
Attaching the pump briefly turns the tire and hose into one connected space. Road Bike Rider explains that once the chuck is on, the tire and pump hose share pressure. Some air moves from the tire into the pump until the pressure evens out, and that is what lets the pump gauge register the current PSI. In other words, your pump gauge is reading the tire and hose together while the head is attached.
Removal is where many riders worry about losing air. According to the same Road Bike Rider answer, the hiss you hear when you properly remove a Presta chuck is generally air escaping from the pump hose, not the tire. A threaded chuck, like the ones on some frame pumps, is fiddlier and can sometimes let a bit of tire air out during removal.
So a hiss alone doesn't mean your tire dropped by the same amount. It does mean the attach and remove steps are part of the measurement. If one pump uses a press-on head and the other a threaded chuck, the way each comes off the valve is one more variable in your bike pump pressure readings. Neither source puts a typical size on these effects, so keep them consistent rather than blaming a specific gap on one of them.
How to Compare Two Bike Pump Readings Consistently
The way to settle a mismatch is to compare both pumps against the same independent reference gauge, at the same pressures, under the same conditions. Without that third gauge, two pump displays can only tell you they disagree, not which one is closer.
That is the logic behind how OutdoorGearLab rated pump gauges. It measured each pump gauge against a highly accurate digital gauge at 20, 50, and 100 PSI, then averaged the differences into an accuracy score. Its results show that the gap from the reference varies from pump to pump and from one pressure to another. You can borrow the same reference idea at home:
- Pick two or three checkpoints inside the range you normally ride, and never go above the maximum pressure marked for your tire or rim.
- Use the same tire and valve for every check, and attach and remove each pump head the same way each time.
- Inflate with the first pump until its gauge shows the first checkpoint, remove the head, and measure right away with the reference gauge. Write down both numbers.
- Repeat for each checkpoint, then run the whole sequence with the second pump.
- For each pump, take the absolute difference from the reference at every checkpoint, ignoring plus or minus, and average those differences.
Here is an illustrative example with made-up readings. Both pumps are set to 30, 35, and 40 PSI. After Pump A, the reference reads 28.5, 33.0, and 38.5 PSI, so the differences are 1.5, 2.0, and 1.5. That works out to (1.5 + 2.0 + 1.5) ÷ 3 = 1.67 PSI. After Pump B, the reference reads 29.5, 35.5, and 39.0 PSI, giving differences of 0.5, 0.5, and 1.0, or 2.0 ÷ 3 = 0.67 PSI. In this example, Pump B tracks the reference more closely across those three checkpoints.
A lower average only applies to the pressures and conditions you tested. It isn't a universal accuracy rating. If the gap persists, set your pressure with the pump that tracked the reference more closely, and redo the check at your riding pressures if your first round used different ones. For very low trail pressures, our guide to verifying gauge accuracy at low pressure covers field checks below 15 PSI. If you have no reference gauge, pick one pump and use it every time, so each change you make is measured on the same scale.
FAQs
How big a difference between two pumps is normal?
No universal tolerance applies to bike pump gauges. In OutdoorGearLab's testing, the closest gauge averaged 0.6 PSI from the reference, and the others were farther off. A small gap between two pumps is not, by itself, a sign that either one is broken. It is a reason to run a reference check if the difference matters for how you set up your tires.
Should I split the difference between the two readings?
Averaging two unverified readings just gives you a third unverified number. It doesn't move you closer to the real pressure unless both pumps happen to be off by equal amounts in opposite directions, and you have no way to know that without a reference. Pick the pump that checked closer to a reference, or use one pump consistently.
Are 20, 50, and 100 PSI the pressures I should test at?
No. Those are the checkpoints OutdoorGearLab used to compare gauges across a wide range, not tire pressure recommendations. A home check is more useful at the pressures you actually ride, since a pump's error can differ from one pressure to another. Stay within your tire and rim limits.
Does my reference gauge need to be digital?
What matters is that the reference is known to be accurate, not how many digits it shows. OutdoorGearLab used a highly accurate digital gauge, but extra decimal places alone don't make a gauge trustworthy. If you are choosing one, our guide to choosing an accurate tire gauge explains what to look for, though it is written with car tires in mind.
Leave a comment
This site is protected by hCaptcha and the hCaptcha Privacy Policy and Terms of Service apply.