












































After installing a new tube, check three things before riding: the tire bead should sit evenly on both sides, the pressure should match the tire or bike maker’s recommendation and hold, and—if you removed the wheel—the wheel should be secure and the brakes should work.

Inflating the tire without a problem doesn’t confirm that it’s seated correctly or holding air. You can do this bike tire inspection at home, in the garage, or at the trailhead.
What to Check Before Riding
Check these in order:
- Tire seating: Look at both sides of the wheel, all the way around. The bead should sit evenly, with no tube visible between the tire and rim.
- Pressure and air retention: Pressure should match the recommended figure for your tire or bike, and the tire should hold that pressure after inflation.
- Wheel and brakes (only if you removed the wheel): The wheel should be attached correctly for your bike’s design, and the brakes should be reconnected and working.
If any check fails, keep the bike parked until you fix the problem. The sections below explain what to look for.
Check Tire Seating on Both Sides
Look at both sides of the tire, all the way around the rim. The bead should sit evenly, with no tube sticking out. These steps are based on repair guides for clincher tires, which use an inner tube.

- Before adding much air, check that the tube isn’t caught between the rim and tire bead along both edges, as REI recommends.
- Park Tool’s repair guide says to check both sides for even bead seating and make sure no part of the inner tube is sticking out.
- Inflate to low pressure, then check the bead on both sides again. Find the small molding line just above the bead. Park Tool says it should run at a consistent height above the rim.
- Keep inflating slowly. REI recommends checking both sides as you go to make sure the bead stays seated. Also make sure the valve stays straight.
If the molding line is closer to or farther from the rim in one spot, the bead isn’t seated evenly there. Park Tool recommends adjusting the bead or reinstalling the tire if the tube is showing. A straight valve is a sign of alignment, but it won’t tell you whether air is leaking.
Confirm Pressure and Check for Air Loss
Inflate to the recommended pressure printed on the tire or listed in the owner’s manual, and check it with a gauge as REI’s flat-tire guide recommends. No single PSI works for every bike, so use the number specified for your setup. If the sidewall lists a maximum pressure, remember that is an upper limit rather than the recommended pressure.
Reaching the right number answers only half the question. A gauge shows the pressure at the moment you check it; it can’t tell you whether air is still escaping from the tube or around the valve. Check the pressure again just before riding. If the reading is lower than it was after inflation, or the tire feels softer, the tube is losing air and the repair isn’t finished.
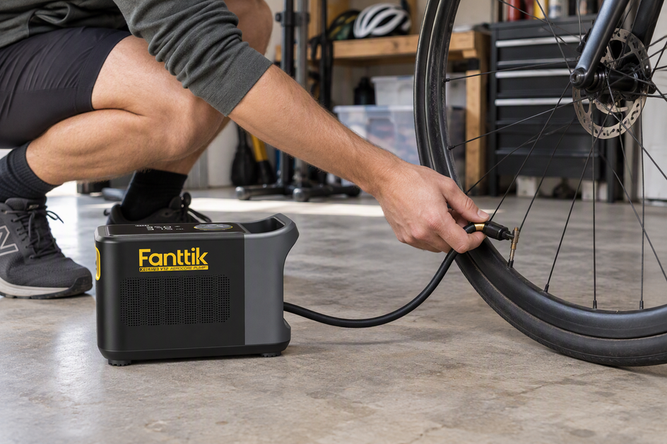
Use a pump head that fits your valve to add air or recheck pressure. The guide to Presta and Schrader valve adapters explains how each valve type opens.
If You Removed the Wheel, Check Its Retention and Brakes
If the wheel stayed on the bike, skip this step. If you removed it, secure it according to your bike’s design, then check the brakes separately.
- Quick-release wheels: REI’s instructions say the axle should sit firmly in the dropouts. Dropouts are the slots in the frame or fork that hold the axle.
- Brakes: The same guide says to reconnect the brakes if you had to open them to remove the wheel, then make sure they work.
- Other axle systems: If your bike uses a different design, such as a thru-axle or bolted axle, check that it is secured tightly according to the bike or wheel maker's manual instead of following quick-release steps.
A secure wheel doesn’t prove that the brakes work, and working brakes don’t prove that the wheel is secure. Both checks need to pass.
What to Do If a Check Fails
Don’t ride. Fix the problem, then repeat the check.
- Uneven bead or tube showing: Park Tool recommends adjusting the bead or reinstalling the tire if needed. Then check both sides again.
- Visible bulge or lopsided tire: Treat this as a failed seating check. Correct it before riding. If the bulge doesn’t go away, have the tire checked.
- Pressure keeps dropping: A tire that won’t hold pressure isn’t ready to ride, even if it looked fine at first. Find the cause before setting off.
- Loose wheel or brakes that don’t work: Reinstall the wheel using your bike’s instructions, and reconnect the brakes so they work properly.
- Cause still unclear: If you can’t find or fix the problem, take the bike to a qualified bike mechanic. Don’t keep riding and hope it holds.
FAQs
What is the molding line on a bike tire?
It’s a thin line molded into the tire’s sidewall, just above the bead. Park Tool’s guide uses it as a visual reference. When the bead is seated, the line stays at a consistent height above the rim on both sides of the wheel.
Do these checks apply to tubeless or mountain bike tires?
Yes, for tube-type mountain bike tires: if your mountain bike uses standard clincher tires with an inner tube, these same bead-seating, pressure, and wheel checks apply. However, tubeless setups follow a different seating and sealing process without an inner tube. For trail riders running tubeless systems, our mountain bike tire inflation guide covers tubeless pressure starting points.
What if I changed the tube without taking the wheel off?
You can skip the wheel-retention and brake check because you didn’t remove the wheel. The tire-seating and pressure checks still apply. Look at both bead edges and check the pressure again before riding.
Leave a comment
This site is protected by hCaptcha and the hCaptcha Privacy Policy and Terms of Service apply.