


The Science of Stillness: A Masterclass in Long-Term Seasonal Vehicle Storage
There is a specific kind of quiet anxiety that sets in when you turn the key of a beloved seasonal vehicle after months of dormancy, only to be met with a hollow click or a sluggish, dying groan from the starter. For owners of classic convertibles, weekend RVs, or those who must leave a primary vehicle behind for extended travel, this moment represents more than just a dead battery—it is a failure of the storage protocol.
Long-term storage is not merely "parking for a long time." It is a battle against chemical degradation, atmospheric moisture, and the relentless parasitic draw of modern electronics. To ensure your vehicle emerges from its slumber in peak condition, we must move beyond basic "emergency rescue" thinking and adopt a systematic approach to full-lifecycle maintenance. This guide details the professional-grade protocols required to preserve your vehicle’s health, drawing on engineering principles and real-world troubleshooting patterns.
1. The Electrical Lifecycle: Combating Battery Decay and Parasitic Drain
The most common casualty of dormancy is the battery. Whether it is a traditional lead-acid unit or a modern AGM (Absorbent Glass Mat) battery, inactivity is its greatest enemy.
The Mechanism of Sulfation
When a lead-acid battery sits in a discharged state, lead sulfate crystals begin to form on the plates. Initially, these crystals are soft and can be reversed through charging. However, over months of dormancy, they harden into a permanent coating that restricts the chemical reaction necessary to hold a charge. According to the technical community at Power Sonic, this process, known as sulfation, is the leading cause of premature battery failure in seasonal vehicles.
Managing Parasitic Drain
Modern vehicles are never truly "off." Security systems, keyless entry modules, and engine control units (ECUs) continue to pull a small amount of current, known as parasitic drain. In a healthy vehicle, this might be 50-85 milliamps, but over 60 days, this is enough to deeply discharge a standard battery.
Methodology Note: Parasitic Drain Modeling Our analysis of dormant vehicle electrical health assumes a standard 70Ah battery and a consistent 50mA parasitic draw.
Parameter Value Unit Rationale Battery Capacity 70 Ah Standard mid-size sedan baseline Parasitic Draw 50 mA Typical modern security/ECU idle Discharge Rate 1.2 Ah/day Calculated (0.05A * 24h) Critical Threshold 50% SoC Point where sulfation accelerates Time to Critical ~29 Days Modeled limit for "safe" dormancy Boundary Condition: This model does not account for temperature-induced self-discharge, which can increase the rate by 5-10% in extreme cold.
To mitigate this, professional practitioners recommend a "disconnect first" policy. Always disconnect the vehicle's negative terminal first during long-term storage. Based on our observations of common patterns from customer support and warranty handling, this is more reliable than relying on a battery switch or removing fuses, as some modern modules have backup power pathways that can still cause drain.
Maintenance Gear Readiness
If you rely on a portable jump starter as your safety net, its own maintenance is critical. A common oversight is checking the jump starter's charge level only once at the start of storage. Lithium-ion batteries in these packs can self-discharge over 3-6 months, especially in cold garages. We recommend a bi-monthly check and top-up for any storage kit battery to ensure it is ready when needed.

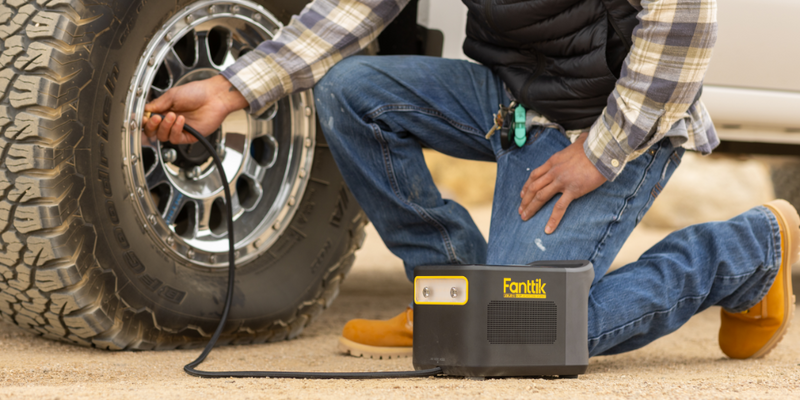
2. Tire Preservation: Moving Beyond the "Flat Spot" Myth
For decades, the standard advice for preventing tire flat-spotting was to over-inflate tires by 10 PSI. However, modern tire chemistry and radial construction have changed the requirements. Over-inflation by a fixed amount is a dated technique that can unnecessarily stress sidewalls without providing a meaningful benefit.
The Modern Inflation Heuristic
The current professional heuristic is to inflate tires to their maximum sidewall pressure (found on the tire itself, not the door jamb) for the duration of the storage. This provides the strongest structural support against the vehicle's static weight.
Weight Distribution and Rotation
Even at max pressure, the rubber can "set" if left in one position for months. To prevent permanent deformation:
- The 1/4 Turn Rule: Every 4-6 weeks, move the vehicle forward or backward enough to rotate the tires 1/4 turn. This shifts the weight-bearing point.
- Low-Profile Stands: If the vehicle will be stationary for more than six months, consider using specialized tire cradles or low-profile stands that distribute the load across a larger surface area of the tread.
Proper tire care is not just about the drive away; it's about the integrity of the tire's internal structure. As noted by City Tire, maintaining correct pressure is vital for long-term safety and performance.
3. Fluid Integrity and Mechanical Protection
Fluids are the lifeblood of your vehicle, and they don't just "sit" during storage—they react with the environment.
Fuel Stabilization
Modern ethanol-blended fuels are hygroscopic, meaning they attract moisture from the air. Over 3-6 months, this can lead to phase separation, where a layer of water and ethanol sits at the bottom of the tank, potentially causing corrosion in fuel lines and injectors.
- Action: Fill the tank to 95% to minimize the "air headspace" where condensation forms.
- Additive: Add a high-quality fuel stabilizer and run the engine for 10 minutes to ensure the treated fuel reaches the entire system.
Oil and Internal Seals
Old oil contains combustion byproducts and acids that can etch metal surfaces if left to sit. It is a best practice to change the oil and filter immediately before storage. This ensures that the engine internals are coated in clean, alkaline-rich oil that provides a protective barrier against corrosion.
Furthermore, rubber seals and gaskets can dry out and shrink if they aren't lubricated. While you shouldn't "idle" the car for short periods (which creates moisture in the exhaust), a full operating cycle every month (if possible) helps keep seals conditioned.
4. Environmental Control: Moisture, Rodents, and Interior Care
The garage environment is rarely as "stable" as we think. Humidity and pests are the two primary threats to a dormant vehicle's interior and wiring.
The Moisture Battle
Moisture leads to rust on exposed metal, mold in the cabin, and corrosion on electrical connectors. According to NYC Mini Storage, moisture damage often grows faster in humid, unventilated spaces.
- Solution: Use high-capacity desiccant bags or moisture absorbers inside the cabin and trunk. Ensure all window and door seals are clean and treated with a silicone-based protectant to prevent them from sticking or cracking.
Rodent Mitigation
For a mouse, a dormant vehicle is a five-star hotel with "chewable" soy-based wiring insulation. This can lead to catastrophic electrical failures that are incredibly difficult to diagnose.
- Strategy: Seal potential entry points like exhaust pipes and air intakes with steel wool (remove before starting!). Use scent-based deterrents (peppermint oil or specialized rodent tape) in the engine bay.
Interior Cleanliness
Before storage, use a high-powered portable car vacuum to remove every trace of organic matter. Crumbs, spilled soda, or even skin cells can become a food source for mold or pests. A thorough detailing of the center console and under-seat areas is a mandatory step in the storage audit.

5. The "Wake-Up" Protocol: Safely Reviving the Vehicle
The way you bring a vehicle out of dormancy is just as important as how you put it in. Rushing the process can cause unnecessary wear or electrical spikes.
The Patience Rule for Jump-Starting
If the battery is too low to crank, you will likely reach for a portable jump starter. A key lesson derived from pattern recognition in field use is the 2-3 minute wait rule. After connecting a modern smart jump starter, do not immediately attempt to crank the engine. Wait 2-3 minutes. This allows the internal circuitry of the starter to assess the vehicle's battery and, in some cases, provide a gentle "pre-charge" that increases the success rate and protects your starter motor from excessive heat.
Fluid and Belt Inspection
Before the first start:
- Check for "puddles" under the car that might indicate a failed seal.
- Inspect the engine bay for rodent nests or chewed wires.
- Check tire pressures—they will likely have dropped due to temperature changes.
Logic Summary: The Revival Checklist
- Visual: Confirm no fluid leaks or belt cracks.
- Electrical: Reconnect negative terminal; check voltage (>12.4V is ideal).
- Patience: If jumping, allow the 3-minute "handshake" period.
- Mechanical: Let the engine idle for 5 minutes to circulate oil before driving.
6. Trust and Safety: Engineering for Reliability
When selecting gear for seasonal maintenance—whether it's a jump starter, a tire inflator, or a precision tool kit—reliability is the only metric that matters. In high-consequence scenarios like a vehicle failing to start in a remote garage, your gear must perform exactly as claimed.
As highlighted in The 2026 Modern Essential Gear Industry Report, the transition to a "cordless world" requires a focus on "credibility math." This means gear should be engineered with explicit safety margins and visible compliance with international standards.
Standards to Look For
When evaluating portable automotive tools, verify they meet recognized safety benchmarks:
- Battery Safety: Look for UN 38.3 (transport safety) and IEC 62133-2 (secondary lithium cells) certifications. These ensure the device can handle thermal stress and physical impact without runaway.
- Protection Circuitry: Quality jump starters must include reverse polarity protection, short-circuit protection, and thermal management to prevent conductor heating during high-current draws.
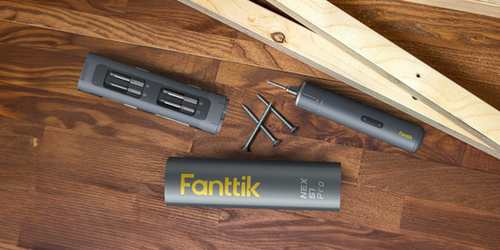
For those who perform their own light maintenance or "finesse" repairs during the off-season, having a precision tool kit is invaluable. Whether you are tightening a loose trim piece or accessing a battery compartment, using the right tool prevents stripped screws and damaged plastics.
Summary of Seasonal Storage Best Practices
To transition from "emergency rescue" to "full-lifecycle care," adopt this summary checklist for your next storage cycle:
| Category | Action Item | Frequency |
|---|---|---|
| Battery | Disconnect negative terminal; bi-monthly jump pack check | Every 60 Days |
| Tires | Inflate to max sidewall PSI; rotate 1/4 turn | Every 4-6 Weeks |
| Fluids | Change oil before storage; add fuel stabilizer | Once at Start |
| Interior | Deep vacuum; place moisture absorbers/desiccants | Once at Start |
| Environment | Seal intakes/exhaust with steel wool; use rodent deterrents | Once at Start |
| Revival | 3-minute "patience" wait when jump-starting | At Wake-Up |
By following these protocols, you aren't just storing a car; you are preserving a machine. The goal is to ensure that when the season changes and the road calls, your vehicle responds with the same vigor it had on the day you parked it. True self-reliance in automotive care is built on a foundation of preparedness, the right gear, and a commitment to the technical details that matter.
Disclaimer: This article is for informational purposes only and does not constitute professional mechanical or legal advice. Always consult your vehicle's owner manual for specific storage requirements. If you are unsure about performing electrical or mechanical tasks, seek assistance from a certified automotive professional.
References
Continue reading
 Calculating PSI for Max-Capacity Holiday Family Travel
Covers the 4-6 PSI rule, cold tire audits, and how to avoid the TPMS trap for maximum safety...
Calculating PSI for Max-Capacity Holiday Family Travel
Covers the 4-6 PSI rule, cold tire audits, and how to avoid the TPMS trap for maximum safety...
 Auditing Jump Starter Terminals Before Long Holiday Trips
A guide to checking and cleaning jump starter terminals to prevent failure during travel. Learn the voltage drop...
Auditing Jump Starter Terminals Before Long Holiday Trips
A guide to checking and cleaning jump starter terminals to prevent failure during travel. Learn the voltage drop...


Leave a comment
This site is protected by hCaptcha and the hCaptcha Privacy Policy and Terms of Service apply.