


Quick Start: Sand Traction Action Card
For those needing immediate guidance before hitting the dunes, follow this practical protocol. Note that these values are heuristics (rules of thumb) based on common off-road experience and should be adjusted for your specific vehicle and tire type.
| Step | Action | Target / Metric |
|---|---|---|
| 1. Calculate | Use the 1 PSI per 100 lbs rule. | e.g., 5,000 lb vehicle = ~12.5 PSI starting point. |
| 2. Air Down | Deflate based on load (heavier axle gets slightly more PSI). | Floor: 12 PSI (without beadlocks). |
| 3. Bulge Test | Drive 20 feet; check for sidewall "squish." | Ideal: 1.0–1.5 inches of lateral bulge. |
| 4. Feel | Monitor steering resistance. | Heavy steering = Footprint is too small; go lower. |
| 5. Re-inflate | Use a high-output compressor before hitting pavement. | Standard: 2.0+ CFM for efficiency. |
The Science of Flotation: Why Surface Area Matters
When a vehicle transitions from asphalt to soft sand, the physics of movement change fundamentally. On a hard road, tires typically rely on higher pressure to maintain a small, efficient contact patch that reduces rolling resistance. However, on sand, that same high pressure often becomes a liability. The weight of the vehicle is concentrated on four small points, exerting a downward force that can exceed the sand's bearing capacity. This frequently results in "digging"—where the tire displaces sand vertically rather than moving the vehicle horizontally.
To understand why we air down, we look at the standard ground pressure formula: P = F / A. In this simplified model, P is the pressure exerted on the ground, F is the force (the weight of your vehicle), and A is the area of the contact patch. Since we cannot easily change the weight of the vehicle mid-trail, a primary lever for reducing ground pressure is to increase the area (A).
According to technical guides on Ground Pressure, increasing the surface area effectively "floats" the vehicle on top of the substrate. By dropping the PSI (Pounds per Square Inch), the tire carcass becomes more flexible, allowing it to deform under the vehicle's weight. This deformation creates the "Footprint Effect," where the tire elongates, spreading the load across a larger surface.
Logic Summary: The "Footprint Effect" is primarily a longitudinal phenomenon. While many beginners assume the tire simply gets wider, the most significant gain in surface area typically occurs along the length of the tire. This elongation helps prevent the leading edge of the tire from acting like a shovel.
The Longitudinal Advantage and Shear Strength
A common observation in the off-road community is that "wider is better" for sand. While a wider tire provides benefits, the primary mechanical advantage of airing down happens in the length of the contact patch. As tire pressure drops, the "bulge" extends forward and backward. This elongated footprint is critical because of how sand generates traction.
Unlike hard surfaces where friction is the primary force, sand relies heavily on shear strength. For a tire to move forward, it must push against a volume of sand. A short, high-pressure footprint may only engage a small amount of sand before it shears (breaks) and the tire spins. An elongated footprint engages a much larger volume of sand simultaneously.
Research into tire tractive performance on soft soil indicates that the ability to generate shear force is often proportional to the length of the contact patch. By increasing this length, you are essentially creating a "tank tread" effect out of your rubber tire. This allows the vehicle to move with potentially less throttle input, reducing the risk of "roosting" or burying the axles.
The Danger of the "15 PSI" Rule of Thumb
If you ask a group of enthusiasts for a recommendation, you will often hear a general rule of 15–18 PSI for sand. For a novice, following this blindly can lead to suboptimal performance. The "correct" pressure is rarely a static number; it is a variable determined by your vehicle's specific load distribution and tire sidewall stiffness.
Based on common patterns observed in field recoveries, using the same PSI for all four tires is a frequent mistake. Most off-road vehicles carry significant weight in the rear—fuel cans, camping gear, and spare tires. If you air down all tires to a flat 15 PSI, the front tires (which carry the heavy engine) may have a different "squish" than the rear. If the front tires remain too hard, they can "plow" or dig in during turns, potentially increasing the strain on your power steering pump.
The "1 PSI per 100 lbs" Heuristic
Instead of a generic number, many experts use the 1 PSI per 100 lbs of load per tire rule as a starting point.
Example Calculation:
- Vehicle GVW: 5,000 lbs (Total weight)
- Load Per Tire: ~1,250 lbs (Assumes roughly equal distribution)
- Calculation: 1,250 / 100 = 12.5 PSI
- Note: If your rear is heavily loaded with 600 lbs of gear, your rear tires might require 1-2 PSI more than the front to maintain the same footprint.
Modeling the Minimum Safe Pressure
The following table provides a model based on common vehicle weights. These values are practical heuristics, not absolute laboratory standards.
| Parameter | Value or Range | Unit | Rationale / Source Category |
|---|---|---|---|
| Gross Vehicle Weight (GVW) | 5,000 - 6,500 | lbs | Standard mid-to-full size overland SUV |
| Per-Tire Load (Average) | 1,250 - 1,625 | lbs | Assumes 50/50 distribution for calculation |
| Heuristic Minimum PSI | 12 - 16 | PSI | Rule of Thumb: 1 PSI per 100 lbs load |
| Critical De-beading Zone | < 10 | PSI | Hazard: High risk of tire separating from rim |
| Ideal Bulge Height | 1.0 - 1.5 | inches | Visual Heuristic: Indicator of optimal flotation |
Method Note: This is a scenario model for radial tires. Individual tire sidewall stiffness (e.g., Load Range C vs. E) will significantly impact how much a tire bulges at these pressures. E-rated tires with stiffer sidewalls may require lower PSI to achieve the same bulge as a C-rated tire.
Measuring the "Bulge": The Visual Heuristic
Since gauges can fail and vehicle weights change, we recommend a practical, visual check known as the "Bulge Test." This is a field-tested method used to verify if your calculated PSI is achieving the desired physical effect.
- Air down to your calculated starting point.
- Drive the vehicle a short distance (20–30 feet) on a flat section of sand to let the carcass settle.
- Stop and inspect the sidewalls.
You are looking for a slight, even "squish" where the tire meets the ground. For most modern all-terrain tires, an ideal contact patch shows a sidewall bulge of approximately 1 to 1.5 inches (Experience-based heuristic). If the tire looks flat or the rim is dangerously close to the sand, the pressure is likely too low for the load. Conversely, if the tire still looks round, the footprint is likely insufficient for soft sand.
One of the most important insights for beginners is learning to "feel" the vehicle. A common sign that you may need to lower your pressure further is a sudden increase in steering effort. If the steering feels heavy or the vehicle feels like it is "plowing" through the sand rather than gliding over it, your front tires are likely still too high.

The Safety Threshold: Avoiding the De-Bead
While lower pressure increases traction, there is a "floor" that should rarely be crossed without specialized equipment like beadlocks. For most standard wheels, dropping below 10–12 PSI significantly increases the risk of a de-bead.
At extremely low pressures, the internal air pressure may no longer exert enough outward force to keep the tire's "bead" (the inner edge) pressed firmly against the wheel rim. If you take a sharp turn or hit a hidden rut at 8 PSI, lateral forces can pop the bead off the rim. Reseating a bead on the trail is a difficult and potentially hazardous task.
As noted in the Ember Offroad guide to tire pressures, maintaining a safety margin of 2–4 PSI above the "absolute minimum" is a recommended practice to avoid tire failure.
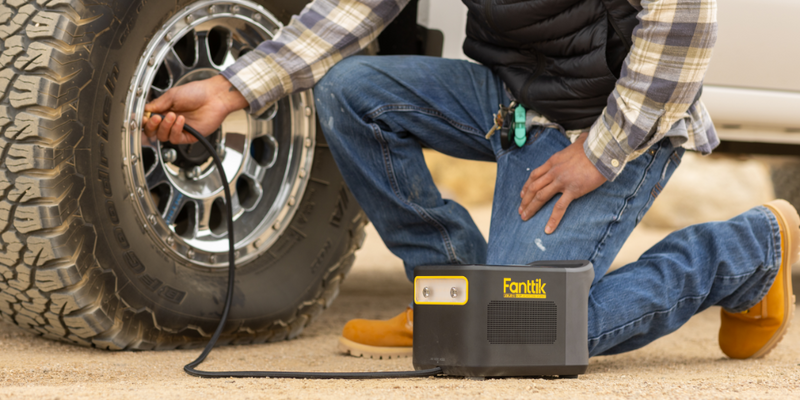
Re-inflation Strategy: The 2.0 CFM Standard
Airing down is only half the battle. Driving at highway speeds on aired-down tires causes rapid heat buildup in the sidewalls, which can lead to catastrophic tire failure (blowouts). Safe exploration requires the ability to return to street pressure immediately upon exiting the trail.
As emphasized in The 2026 Modern Essential Gear Industry Report, technical reliability in "moments of need" is the ultimate metric for gear. For effective trail-to-tarmac transitions, we consider a portable compressor with a minimum 2.0 CFM (Cubic Feet per Minute) free air flow and a 100% duty cycle to be a practical standard for large tires.
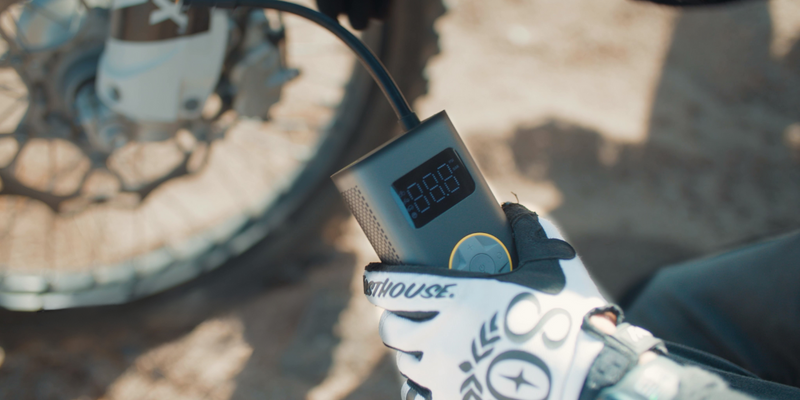
Why 2.0 CFM? (The Math of Air Volume)
To understand why performance matters, consider the volume of a standard 33" off-road tire.
- Volume: A 33" tire holds approximately 2.5 to 3.0 cubic feet of air.
- The Task: To go from 15 PSI (trail) to 35 PSI (street), you must move roughly 1.5 cubic feet of air per tire.
-
The Difference:
- 0.5 CFM Pump: Takes ~3–4 minutes per tire (15+ minutes total, often exceeding the pump's duty cycle).
- 2.0 CFM Pump: Takes ~45–60 seconds per tire (under 5 minutes total).
Duty Cycle (Endurance): A "50% duty cycle" pump may overheat after two tires, forcing a 10–20 minute wait. A 100% duty cycle ensures you can inflate all four tires—and potentially assist others—without the unit shutting down due to thermal protection.
Summary of Best Practices
- Air Down Early: Airing down is most effective as a proactive measure to prevent getting stuck.
- Account for Load: Use the 1 PSI per 100 lbs heuristic to adjust for heavy rear loads or engine-heavy fronts.
- Listen to the Steering: Increased steering resistance is a primary indicator that your footprint is too small.
- Observe the Safety Floor: Avoid dropping below 12 PSI on standard rims unless an emergency recovery requires it.
- Prioritize Re-inflation: Ensure your compressor's CFM and duty cycle are rated for the volume of your specific tires.
Disclaimer: This article is for informational purposes only. Off-road driving and vehicle modifications involve inherent risks. Always consult your vehicle's manual and tire manufacturer specifications before making adjustments. These recommendations are heuristics based on general off-road experience; actual results may vary based on terrain, vehicle weight, and equipment condition.
Sources
Continue reading
 Sidewall Flex Physics: Understanding Puncture Risks at Low PSI
A guide to sidewall flex physics and calculating safe trail tire pressure to prevent pinch punctures and heat...
Sidewall Flex Physics: Understanding Puncture Risks at Low PSI
A guide to sidewall flex physics and calculating safe trail tire pressure to prevent pinch punctures and heat...
 Suspension Care: Maintaining Vehicle Level Through Gear Placement
Covers payload physics, the 50-pound rule for lateral imbalance, and practical diagnostic steps like measuring rake and lean.
Suspension Care: Maintaining Vehicle Level Through Gear Placement
Covers payload physics, the 50-pound rule for lateral imbalance, and practical diagnostic steps like measuring rake and lean.


Leave a comment
This site is protected by hCaptcha and the hCaptcha Privacy Policy and Terms of Service apply.