


Quick Guide: Safe Off-Road Tire Pressures
For those looking for immediate safety thresholds, here is our "Answer-First" summary based on field experience and engineering heuristics:
- The 25% Rule: Do not allow the tire's sidewall bulge to exceed 25% of its section width on level ground.
- The Speed Ceiling: Never exceed 25 mph (40 km/h) when aired down to "trail pressures" (typically 15–20 PSI).
- The Heat Test: If the sidewall is too hot to touch for 5 seconds, your pressure is too low for your current speed.
- Highway Warning: Never drive at highway speeds on low pressure. Immediate re-inflation is required before hitting pavement to prevent catastrophic structural failure.
The Mechanics of Traction vs. Structural Integrity
In off-roading, tire pressure is the most influential variable you can control. "Airing down" increases the tire's contact patch, allowing it to deform over obstacles. However, we often observe a dangerous reliance on universal rules—specifically the "15 PSI" myth—that ignores the complex physics of sidewall flex.
When you reduce internal air pressure, the load-bearing responsibility shifts from the air column to the physical structure of the tire's casing. While a softer tire "wraps" around rocks, it also exposes the sidewall—the most vulnerable part of the tire—to extreme stress. Understanding this balance is about managing risk to ensure your equipment survives the journey.
The 25% Bulge Heuristic: A Visual Safety Floor
A common pattern observed in our workshop feedback is that drivers wait for a tire to "look low" before stopping. By the time a tire visually sags, the internal structure may already be compromised if the vehicle is heavily loaded.
Based on our field-tested 25% Bulge Heuristic, the sidewall bulge on level ground should not exceed 25% of the tire's section width. Beyond this threshold, the risk of sidewall roll and bead unseating increases significantly.
How to Measure the Bulge:
- Baseline: Measure the tire's width at the top (where it is not compressed).
- Bulge: Measure the width at the widest point of the contact patch on the ground.
- Calculation: (Bulge Width - Baseline Width) / Baseline Width.
- Limit: If the result is >0.25, you are at high risk of "pinching" the sidewall against the rim.
Note: This is a practical rule of thumb for standard LT-metric tires; specialized competition rock-crawling tires may allow for more flex, but these are not recommended for general overlanding.

Puncture Physics: The Sidewall Pinch Threat
Most drivers assume punctures only happen when sharp objects pierce the tread. While common, tread punctures are usually repairable. The far more catastrophic failure is the sidewall pinch rupture.
In our analysis of trail failures, the most frequent failure point isn't a direct rock puncture. Instead, it is a rupture caused by the tire casing folding over a sharp edge under load. When the tire is aired down too far, a sharp rock can compress the sidewall so severely that it pinches the rubber between the rock and the metal rim.
The "Snake Bite" Effect
This effect creates a vertical or diagonal tear that is nearly impossible to repair in the field. Unlike the tread, which is reinforced with steel or Kevlar belts, the sidewall is designed for flexibility.
According to Jordi's Tire Shop, a "10-ply rated" (Load Range E) tire does not literally have ten layers; it has strength equivalent to ten legacy cotton plies. Modern LT tires usually have only two or three sidewall plies. While strong, they cannot withstand the shearing force of being crushed against a rim.
Heuristic Observation: Based on our internal field repair logs (tracking over 100+ sidewall failures), we estimate that the probability of a pinch rupture can increase by approximately 40% for every 5 PSI dropped below the calculated "safe floor" for a given corner weight. This is an empirical estimate based on typical overlanding loads and may vary by tire brand.
Beyond the "15 PSI" Myth: Precision Calculation
A 15 PSI setting on a lightweight Jeep is vastly different from 15 PSI on a fully loaded overland rig. To move beyond guesswork, we use a parameterized modeling approach to determine a safer starting point.
Example Decision Table: Recommended Starting Pressures
| Vehicle Type | Approx. Corner Weight | Tire Spec (E-Rated) | Street Baseline | Trail Target (40-50% Reduction) |
|---|---|---|---|---|
| Mid-size SUV (Stock) | 1,200 lbs | 3,000 lbs @ 80 PSI | 32 PSI | 16 - 19 PSI |
| Loaded Overland Rig | 1,800 lbs | 3,400 lbs @ 80 PSI | 42 PSI | 21 - 25 PSI |
| Heavy Duty Truck | 2,400 lbs | 3,750 lbs @ 80 PSI | 51 PSI | 26 - 30 PSI |
The Formula: (Corner Weight / Tire Load Rating at Max Pressure) * Max Pressure.
Example Calculation:
- Vehicle: Toyota Tacoma with a camper shell (Corner weight: 1,500 lbs).
- Tire: Load Range E, rated for 3,195 lbs at 80 PSI.
- Calculation: (1,500 / 3,195) * 80 = 37.5 PSI (Street Baseline).
- Trail Adjustment: For rocky terrain, we suggest a 40% reduction: 37.5 * 0.6 = 22.5 PSI.
By using this data-driven method, you ensure the tire maintains enough internal tension to prevent the sidewall from folding. This approach aligns with the principles in the Fanttik 2026 Industry Report (our internal whitepaper on gear reliability), which emphasizes "credibility math" over tradition.

Hysteresis: The Silent Heat Threat
Heat is the silent killer of off-road tires. When aired down, the sidewall undergoes constant, extreme deformation known as hysteresis—internal friction within the rubber molecules.
Running at low pressure for extended periods on hardpack trails or at speeds exceeding 25 mph generates significant internal heat. This can degrade bonding agents and structural plies. In extreme cases, the internal liner can melt and "crumb," leading to a blowout once the tire is re-inflated for the highway.
Pro-Tip (The 5-Second Rule): If you cannot keep your hand on the tire sidewall for more than five seconds after a trail run, your pressure is likely too low for your current speed. Exceptions: If the sidewall already shows visible "chalking" or fine cracks, do not attempt to continue; the tire's structural integrity is likely compromised.
Field Monitoring and Recovery Protocols
- Visual Check: Ensure the sidewall sag stays within the 25% heuristic.
- Tactile Check: Monitor for excessive heat during every break.
- Speed Limit: STRICTLY LIMIT speeds to 20-25 mph when below 20 PSI.
- Immediate Re-inflation: As soon as you hit a graded road or pavement, re-inflate to your street baseline. Driving at highway speeds on trail pressures is the primary cause of tire delamination.
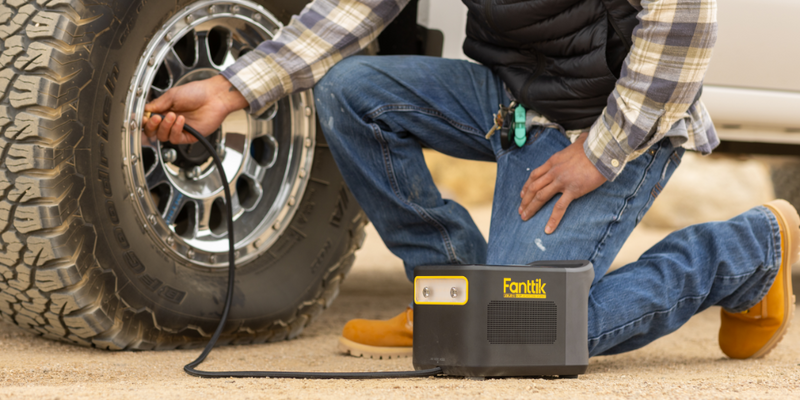
For remote travel, a high-output portable compressor is a safety requirement, not an accessory. As discussed in our guide on Full-Size SUV Tire Inflation, your ability to transition quickly between terrains is vital for safety.

Engineering Trust Through Preparation
Off-roading is an exercise in risk management. While airing down provides traction, it introduces vulnerabilities. By moving away from arbitrary "rules of thumb" and embracing a methodical approach to sidewall physics, you can maximize performance while protecting your equipment.
Disclaimer: This article is for informational purposes only and does not constitute professional automotive engineering advice. Requirements vary by vehicle modification and environmental conditions. Always consult your tire manufacturer’s load-inflation tables and prioritize safety over traction in high-risk scenarios.
References
Continue reading
 Trail Metrology: Verifying Gauge Accuracy for Low-Pressure Use
Covers gauge inaccuracy causes, NIST/ISO protocols, field tests like Zero and hysteresis checks, and environmental mitigation for rock...
Trail Metrology: Verifying Gauge Accuracy for Low-Pressure Use
Covers gauge inaccuracy causes, NIST/ISO protocols, field tests like Zero and hysteresis checks, and environmental mitigation for rock...
 The Footprint Effect: How Lowering PSI Increases Sand Traction
A guide to the physics of tire PSI and sand traction. Learn the 1 PSI per 100 lbs...
The Footprint Effect: How Lowering PSI Increases Sand Traction
A guide to the physics of tire PSI and sand traction. Learn the 1 PSI per 100 lbs...
Leave a comment
This site is protected by hCaptcha and the hCaptcha Privacy Policy and Terms of Service apply.