


The Anatomy of a Trailside Crisis: The De-Beaded Tire
In the world of overlanding and technical rock crawling, "airing down" is a fundamental skill. By dropping tire pressure, we increase the contact patch, allowing the rubber to conform to jagged terrain and providing the flotation needed for soft sand or deep silt. However, this performance gain comes with a structural vulnerability. When internal pressure drops below a certain threshold—often below 10–12 PSI depending on the wheel's rim width and tire stiffness—the tire's bead can slip from the rim’s safety hump into the "drop center."
Once a tire has de-beaded, standard inflation techniques often fail. You are no longer trying to fill a sealed vessel; you are trying to create a seal in a system that is actively leaking air as fast as you can pump it in. Success in this high-consequence scenario depends less on the ultimate pressure (PSI) your inflator can reach and more on the volume flow rate (CFM) it can deliver in the first few seconds.
At our repair bench and through years of field-testing recovery gear, we have observed that bead seating is a binary event governed by fluid dynamics. You either overcome the leak rate to create an initial seal, or you don't. This article breaks down the physics of that "snap" and why high-flow engineering is the difference between continuing your journey and a long, dangerous recovery.

The Physics of the "Snap": Volume vs. Pressure
To understand why high flow is vital, we must look at the mechanical interface between the tire bead and the wheel rim. Most modern tubeless rims feature a "safety hump"—a small ridge designed to keep the bead seated against the outer flange even at low pressures.
When a tire de-beads, the bead bundle falls into the "drop center," the deepest part of the rim. To reseat it, air pressure must push the tire carcass outward with enough force to "snap" the bead over that safety hump.
The Leak Rate Barrier
The primary challenge is the massive air gap between the unseated bead and the rim. If your inflator delivers air at 0.5 CFM, but the air gap allows 0.6 CFM to escape, the internal pressure will never rise. You are essentially trying to blow up a balloon with a hole in it.
To seat a bead, you must achieve a Net Positive Flow. This means the volume of air entering the tire must significantly exceed the volume of air escaping through the gap. Once the air volume is high enough to push the rubber against the rim, a temporary seal is formed. Only then does pressure begin to build, eventually forcing the bead over the hump with a characteristic "pop."
Logic Summary: Our analysis of bead seating mechanics assumes a "Critical Flow Threshold." This is the point where input volume (CFM) exceeds the escape velocity of the air through the unseated bead gap. This threshold varies based on tire volume and the physical size of the air gap.
Modeling the Flow Threshold
Based on our scenario modeling of trail repairs (not a controlled lab study), we can estimate the required flow rates for different tire types. Note that these are heuristics for quick field assessment.
| Vehicle/Tire Type | Typical Tire Volume (L) | Estimated Min. Flow for Seating (CFM) | Rationale |
|---|---|---|---|
| Mountain Bike (29") | ~3–5L | 1.0–2.0 CFM | Small volume; seal is easier to "catch." |
| Standard Sedan (215/55R17) | ~35–45L | 2.5–3.5 CFM | Moderate volume; requires rapid expansion. |
| Off-Road SUV (35" AT/MT) | ~90–120L | 4.0+ CFM | Large volume; massive air gaps require high "shock" flow. |
| Heavy Duty Truck (37"+) | 150L+ | 5.0+ CFM | High carcass stiffness requires significant force to move. |
Note: These values assume the use of a lubricant. Without lubrication, required flow rates can double.
Systemic Flow Optimization: Beyond the Compressor
Many enthusiasts focus solely on the "Max CFM" listed on a product box. However, the compressor is only one part of the system. In our experience, the most common mistake is neglecting the "flow bottlenecks" between the compressor motor and the tire carcass.
The 400% Rule: Valve Core Removal
The standard Schrader valve core is a significant flow restrictor. It is designed to hold pressure, not to allow high-volume throughput. For an emergency bead seat, removing the valve core is a non-negotiable step for experienced practitioners.
By removing the core, you increase the effective airflow area of the valve stem by approximately 400% (calculated from the transition of a ~2mm restricted orifice to an ~8mm open stem). This allows the "shock" of air from a high-performance portable inflator to reach the tire carcass nearly instantaneously, providing the necessary kinetic energy to move the heavy rubber carcass.
The Hidden Enemy: Hose and Chuck Leaks
A high-flow inflator is only as good as its connections. Based on common patterns from customer support and field recovery logs, even a minor leak at the air chuck or a "weeping" hose connection can reduce effective flow at the tire by 10–15%. In a marginal seating scenario, this is often the difference between success and failure. Before attempting a seat, we recommend a quick "finger-over-the-chuck" test to ensure the system is airtight under load.
The Lubrication Variable: Reducing the Friction of Success
If physics is the engine of bead seating, lubrication is the oil. Conventional wisdom treats high flow as the only hardware solution, but reality is that optimizing the system's pre-seal condition is often more impactful than raw CFM.
Why Soap Matters
Proper bead lubrication—using a dedicated bead lube or a concentrated soap-and-water solution—drastically reduces the friction between the rubber bead and the metal rim. According to technical insights often shared in automotive maintenance forums, such as Vehicle's Tire, lubrication can reduce the required seating pressure by up to 50%.
In practical terms, this effectively "doubles" the capability of your inflator. If a dry tire requires 4.0 CFM to move the carcass, a lubricated tire might only require 2.0 CFM. This is critical for portable, battery-powered units where every second of motor runtime consumes valuable energy.
The "Gotcha": Water is Not Lube
We often see beginners use plain water or spit. While better than nothing, water evaporates too quickly and lacks the "slip" of surfactants found in soap. A small spray bottle of dish soap and water is a mandatory item in any overlander's recovery kit.
Hardware Realities: Duty Cycles and Thermal Management
When choosing a portable inflator for high-consequence trail repairs, peak CFM is only half the story. The other half is sustained performance.
The Duty Cycle Trap
A common pitfall is the use of "budget" high-flow units that lack proper thermal management. Seating a stubborn 35-inch tire can take several minutes of continuous operation. A low-quality compressor may deliver a high burst of air initially but then overheat and trigger a thermal shutdown before the bead actually "snaps" over the safety hump.
High-performance units are engineered with robust heat sinks and cooling fans to maintain flow rates even as internal temperatures rise. This aligns with the principles outlined in The 2026 Modern Essential Gear Industry Report: Engineering Trust in a Cordless World, which emphasizes that reliability under stress is the "credibility math" that defines quality gear.
Battery Chemistry and Discharge Rates
For cordless inflators, the internal battery must be capable of high C-rate discharge. Driving a high-flow compressor motor requires significant current. If the battery cells cannot provide this current without a massive voltage drop, the motor speed—and thus the CFM—will plummet exactly when you need it most.
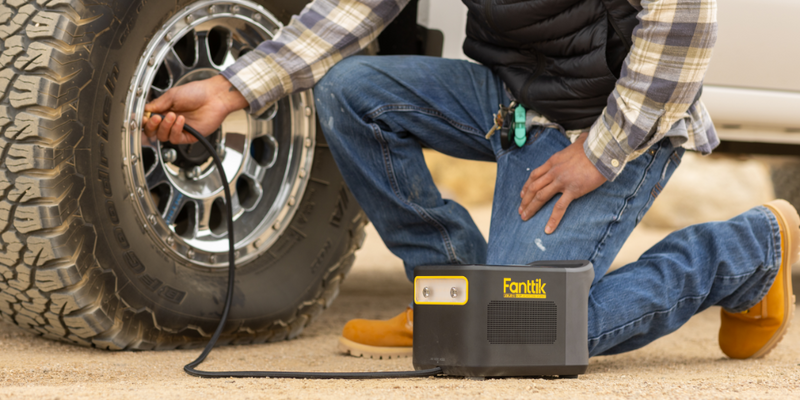
Step-by-Step Guide: Reseating a Bead on the Trail
Based on our field experience and standard recovery protocols, here is the methodical approach to reseating a tire bead using a high-flow portable inflator.
- Safety First: Ensure the vehicle is stable and the wheel is off the ground using a jack. Never attempt to seat a bead on a tire supporting the vehicle's weight.
- Clean the Interface: Use a brush or rag to remove dirt, sand, or rocks from the rim flange and the tire bead. Even a single pebble can prevent a seal.
- Apply Lubricant: Liberally apply soap solution to both the tire bead and the rim's safety hump.
- Remove the Valve Core: Use a valve core tool to remove the core. This is essential for maximum flow.
- Position the Tire: Physically pull the tire carcass toward the outer rim to minimize the air gap as much as possible.
- Connect and Blast: Attach your high-flow inflator. If the unit has a "Manual" or "Turbo" mode, use it to bypass standard pressure-sensing shutoffs.
- Monitor the "Pop": Watch for the tire to expand. You will hear one or two distinct "pops" as the beads seat.
- Reinstall Core and Set Pressure: Once seated, quickly remove the inflator chuck, reinstall the valve core (expect some air loss), and then re-inflate to your desired trail pressure.
Logic Summary: This procedure is a heuristic based on common overlanding practices. Variations in rim design (e.g., beadlocks) or tire carcass stiffness (e.g., Load Range E) may require additional techniques like using a ratchet strap around the circumference of the tire to force the beads outward.
Compliance, Safety, and Trust
When dealing with high-pressure systems and heavy automotive components, safety is paramount. The engineering of portable inflators must adhere to rigorous standards to ensure user protection. For instance, products sold in the European Union must comply with the EU General Product Safety Regulation (EU) 2023/988, which mandates traceability and clear safety documentation.
Furthermore, when transporting these devices, especially those with high-capacity lithium batteries, it is vital to follow IATA Lithium Battery Guidance regarding State of Charge (SoC) and packaging to prevent thermal incidents during travel.
Why Quality Matters in High-Consequence Scenarios
In a remote canyon or a high-altitude pass, your gear is your lifeline. A tool that fails to meet its advertised specifications isn't just a disappointment; it's a safety risk. As noted in the Sema Market Research reports, the trend in the automotive aftermarket is moving toward "Professional Grade" portable tools because enthusiasts recognize that "budget" options often fail when the stakes are highest.
Summary of Technical Insights
To consolidate what we've covered, remember these three pillars of trailside tire repair:
- CFM is King: Pressure (PSI) fills the tire, but Volume (CFM) seats the bead. Look for inflators that prioritize high-volume output.
- Systemic Flow: Remove the valve core to gain a ~400% increase in airflow. Check your hoses and chucks for leaks.
- Lubrication is a Force Multiplier: Soap and water can reduce the "seating threshold" by half, making your portable tool twice as effective.
By understanding the physics of the safety hump and the fluid dynamics of air gaps, you can approach trailside repairs with the confidence of an expert. Whether you are managing High-PSI Trailer Tires or Full-Size SUV Tires, the right combination of high-flow hardware and technical knowledge ensures that a de-beaded tire is a minor detour, not the end of the road.
Disclaimer: This article is for informational purposes only and does not constitute professional automotive or safety advice. Tire repair and recovery involve significant risks, including the potential for high-pressure bursts or vehicle instability. Always consult your vehicle and tire manufacturer's guidelines. If you are unsure of your ability to safely perform these repairs, seek professional assistance.
References
Continue reading
 Duty Cycle Realities: Managing Heat During 4-Tire Air-Up Sets
A guide to managing portable tire inflator heat and duty cycles for off-road and overlanding, covering thermodynamics and...
Duty Cycle Realities: Managing Heat During 4-Tire Air-Up Sets
A guide to managing portable tire inflator heat and duty cycles for off-road and overlanding, covering thermodynamics and...
 Rapid Recovery: Comparing Multi-Hose vs. Single-Point Inflation
A guide comparing multi-hose and single-point tire inflation for off-road recovery. Learn which system offers faster air-up times...
Rapid Recovery: Comparing Multi-Hose vs. Single-Point Inflation
A guide comparing multi-hose and single-point tire inflation for off-road recovery. Learn which system offers faster air-up times...


Leave a comment
This site is protected by hCaptcha and the hCaptcha Privacy Policy and Terms of Service apply.