


The Payload Paradox: Why Less is More in Expedition Preparedness
In the world of overlanding, there is a persistent misconception that capability is measured by the volume of gear strapped to a vehicle. This "just in case" mentality often leads to the Payload Paradox: as enthusiasts add more equipment to solve potential problems, they often create new, more certain issues related to mechanical strain, safety, and efficiency.
Quick Summary: The Payload Audit Strategy
- Establish a Baseline: Use a commercial scale to find your "as-packed" weight.
- The Three-Use Rule: If an item doesn't serve three functions or isn't a critical safety/recovery tool, reconsider its place.
- Optimize Distribution: Move heavy items from the roof to a low, central position.
- Consolidate: Replace single-purpose tools with multi-functional, modern hardware.
A systematic payload audit is a methodical process of evaluating every ounce of weight against its utility and impact on vehicle dynamics. By removing redundant mass, practitioners can help restore a vehicle's engineered safety margins and improve trail performance.
The Physics of Overloading: Beyond Legal Compliance
While many overlanders worry about legal weight limits at commercial weigh stations, the reality is that enforcement for private vehicles is rare. However, the absence of a fine does not mean there is an absence of risk. Overloading creates cumulative mechanical strain on the vehicle’s ecosystem.
Based on common patterns observed in community forums and mechanical reports (such as Team-BHP), every 100 lbs (45 kg) of added payload can reduce fuel economy by approximately 1-2% depending on driving conditions. Furthermore, springs and shocks, which are designed to operate within a specific stroke range, may see a reduction in service life—in some cases up to 30%—when consistently operated near or above the Gross Vehicle Weight Rating (GVWR).
The High Cost of High Weight: Center of Gravity
One of the most critical errors in gear placement is mounting heavy items on roof racks. A common example is the Roof-Top Tent (RTT). While convenient, a high-mounted RTT—often weighing between 120 and 180 lbs—can significantly raise a vehicle's vertical Center of Gravity (CG).
Illustrative Model: Center of Gravity Impact This model serves as a heuristic for a standard mid-size SUV (e.g., 4Runner, Wrangler) with a baseline CG height of ~30 inches. Actual shifts depend on specific vehicle geometry and suspension tuning.
Parameter Estimated Range Unit Rationale RTT Mass 120 - 160 lbs Standard hardshell/softshell average Mounting Height 75 - 80 inches Standard roof rack height CG Shift +4 - 8 inches Estimated rise in vertical CG Rollover Risk ~30 - 45% increase % Modeled increase in dynamic instability Handling Impact Notable - Increased body roll and slower steering response
This shift can worsen handling stability, especially in off-camber situations where the risk of rollover is highest. Shifting even 100 lbs from a roof rack to a low, central storage point—such as the floor behind the front seats—can measurably improve handling on technical trails.

The Systematic Payload Audit: A Step-by-Step Framework
A payload audit is a discipline rather than a one-time event. To achieve an optimized kit, one must utilize objective heuristics rather than emotional attachment.
Step 1: Establishing the Baseline
Before removing gear, you must know your starting point. Use a local CAT scale or landscape yard scale to find your vehicle’s "as-packed" weight (including passengers and fuel). Compare this to the GVWR listed on your door jamb. If you are within 10% of the limit, an audit is strongly recommended to preserve vehicle longevity.
Step 2: Applying the "Three-Use Rule"
A practical rule of thumb used by many expedition leaders is the Three-Use Rule. If a tool or piece of gear does not serve at least three distinct functions during a typical trip, it is a candidate for removal or consolidation.
- Example: A single-purpose heavy axe can often be replaced by a compact, high-efficiency folding saw and a multi-function survival tool.
- Example: Multiple heavy water containers can be replaced by a single durable bladder paired with a robust filtration system, as noted by long-distance expedition experts.
Step 3: Identifying Redundancy
While carrying "spares for your spares" feels safe, it can result in significant "dead weight." The goal is resilience, not absolute redundancy. Focus on high-quality, multi-purpose items that adhere to ISO Standards for durability.
Note on Reliability: In our experience with expedition prep, mechanical reliability is often a function of total mass. By reducing mass, you reduce the stress on components, potentially lowering the probability of failure and the need for an excessive number of heavy repair tools.
Strategic Consolidation: Tools and Maintenance
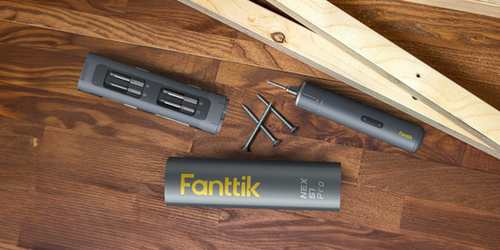
The trend in modern expedition kits is toward compact, cordless, and multi-function hardware. These tools replace several single-purpose items, saving weight and space.
For instance, in repair kits, practitioners are increasingly moving toward rotary tools with interchangeable attachments. This consolidation aligns with the principles outlined in The 2026 Modern Essential Gear Industry Report, which emphasizes that efficiency in a cordless world is built through engineered reliability.
Maintenance Gear and Fluid Management
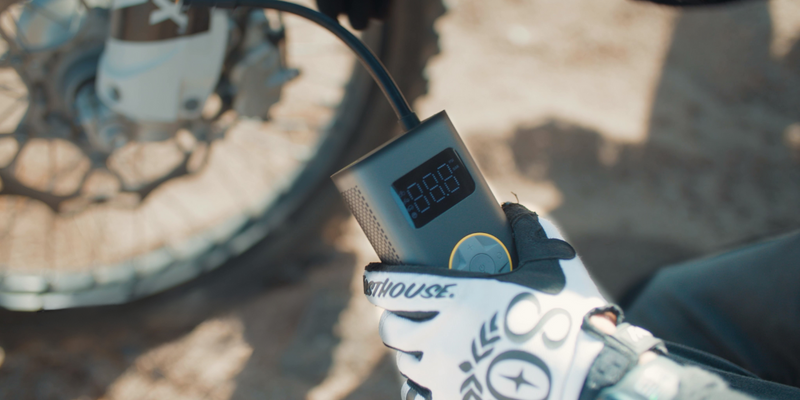
- Tire Management: Instead of a heavy, vehicle-mounted compressor, many now opt for compact, digital portable tire inflators. These units are often more precise and can be used for multiple tasks, fulfilling the Three-Use Rule.
- Electrical Safety: When carrying lithium-battery-powered tools, it is essential to follow IATA Lithium Battery Guidance for safe transport and storage to ensure weight-saving measures don't introduce new hazards.
The ROI of Weight Reduction: Range and Cost
Weight auditing has a direct impact on logistical efficiency. Borrowing a heuristic from general physics—where weight reduction correlates with fuel savings—we can model the potential returns for an overlanding setup.
Theoretical Model: Fuel Economy ROI Assumes a 6,000 lb loaded vehicle on a 5,000-mile expedition. Figures are estimates for illustrative purposes.
Parameter Value Unit Rationale Baseline Weight 6,000 lbs Average expedition SUV Weight Reduction 600 (10%) lbs Achievable through rigorous auditing Est. Fuel Savings ~5 - 8% % Calculated efficiency gain range Range Extension ~20 - 40 miles Estimated per tank, depending on vehicle
On a long-distance trip, a 5-8% improvement in fuel economy translates to cost savings and, more importantly, an extension of the vehicle's remote range. This may allow for deeper wilderness travel without the need for heavy auxiliary fuel cans.
Safety Standards and Compliance
When selecting gear to replace heavier alternatives, technical specifications must remain the priority. Ensure electrical components meet IEC Standards for safety and that materials are tested according to ASTM Standards.
Furthermore, all gear should comply with the EU General Product Safety Regulation (EU) 2023/988, which ensures that products meet rigorous safety and traceability requirements. This is especially important for items like portable power stations or high-pressure inflators, where failure could result in injury or vehicle damage.

Optimizing Vehicle Dynamics through Distribution
Once the audit is complete, the final step is optimizing the distribution of the remaining gear. Proper Weight Distribution is as vital as total mass.
- Heavy Items Low: Place water, fuel, and heavy recovery gear as close to the floor and as central between the axles as possible.
- Frequency of Use: Pack items used daily (kitchen gear, chairs) in accessible locations, but ensure they do not block critical Visibility.
- Unsprung Mass: Avoid adding excessive weight to the wheels or axles (e.g., oversized tires) unless the terrain demands it, as this increases the workload on the suspension and braking systems.
Payload Audit Checklist
Use this checklist during your next pack-out to ensure your vehicle remains within safe operating margins.
| Action Item | Method | Target/Goal |
|---|---|---|
| Initial Weigh-In | Visit a CAT scale fully loaded. | Compare to GVWR on door jamb. |
| Roof Audit | List every item on the roof. | Aim for <100 lbs (excluding rack). |
| The 3-Use Test | Evaluate tools/kitchen gear. | Remove single-use items. |
| Fluid Check | Assess water/fuel volume. | Carry only what is needed for the next leg. |
| Tool Consolidation | Replace hand tools with multi-tools. | Reduce tool roll weight by 20%. |
| Distribution Check | Verify heavy items are low/central. | Lower the Center of Gravity. |
Disclaimer: This article is for informational purposes only and does not constitute professional automotive engineering or legal advice. Modifications to vehicle payload and center of gravity can significantly affect handling and safety. Always consult your vehicle's owner manual and a qualified mechanic before making significant changes to your setup. Quantitative models provided are estimates and may vary based on vehicle type and environmental conditions.
Sources
Continue reading
 Diagnosing Vehicle Lean: Troubleshooting Off-Road Gear Imbalance
A guide to diagnosing and fixing vehicle lean in off-road rigs, focusing on gear distribution, cumulative loading, and...
Diagnosing Vehicle Lean: Troubleshooting Off-Road Gear Imbalance
A guide to diagnosing and fixing vehicle lean in off-road rigs, focusing on gear distribution, cumulative loading, and...
 Calculating Overlanding GVWR: Factoring in Portable Tool Weight
Covers payload calculations, consumable weight, and gear consolidation strategies for vehicle reliability.
Calculating Overlanding GVWR: Factoring in Portable Tool Weight
Covers payload calculations, consumable weight, and gear consolidation strategies for vehicle reliability.


Leave a comment
This site is protected by hCaptcha and the hCaptcha Privacy Policy and Terms of Service apply.