









































Losing about 3 PSI a week on an aluminum wheel can happen when corrosion builds up at the bead seat, the narrow rim edge where the tire forms its air seal. That specific rate is not a universal corrosion pattern; it's a reported symptom that points toward a slow leak somewhere in the tire-valve-wheel system. Before assuming corrosion, localize the leak with a bubble-solution check, keep the tire near its documented pressure, and treat repeated top-ups with a cordless tire inflator as a stopgap rather than a repair.
What Does Losing 3 PSI a Week Mean?
A weekly pressure drop like this fits the pattern of a bead-seat leak, but the number by itself doesn't prove corrosion caused it. You still need to find where the air is actually escaping.
Why Corrosion Can Create a Slow Leak
The bead seat is where the tire's inner edge presses against the wheel to hold air in. Road grit and moisture can work into that narrow gap over time, and every time the vehicle moves, there's slight relative motion between the tire and wheel at that contact point. That motion lets abrasive particles wear the surfaces, and corrosive material from the environment can intrude at the same interface. Eventually a path for air opens up, and a tire that seemed fine starts losing pressure slowly over days or weeks instead of going flat all at once, a pattern documented in a manufacturer service bulletin on wheel bead seat corrosion.
Why 3 PSI Is Not a Universal Corrosion Rate
How fast a bead leak grows depends on how much corrosion has built up, how rough the sealing surface has become, and even ambient temperature swings. A similar weekly loss can also come from a leaking valve stem or a small tread puncture, so the rate alone can't tell you which one you're dealing with. The next step is finding the actual leak location, not just tracking the number on the gauge.
How to Check for a Bead-Area Leak Without Dismounting
You can narrow down a suspected bead leak at home with soapy water and a visual check, without removing the tire from the wheel. This won't confirm corrosion on its own, but it tells you where to look next and what to report to a tire shop.
- Check the tire cold and record the current pressure so you have a baseline for comparison.
- Look over the visible tread for embedded objects, cuts, or anything obviously stuck in the rubber.
- Mix a simple soap-and-water solution and apply it around the valve stem, the accessible tread, and the visible outer edge of the bead where the tire meets the rim.
- Watch each area for a few minutes. A single small bubble can be normal foam, but a steady stream or growing bubbles mean air is escaping at that spot.
- Note exactly where bubbles appeared, or if none did, and bring that detail to a tire shop rather than treating a clean-looking check as a final answer.
No bubbles doesn't rule out a slow or intermittent leak, since some bead leaks only show up under load or after the wheel warms up on the road. If pressure keeps dropping despite a clean bubble test, that's a case for tire-service equipment rather than more solution and patience.

Bead Leak vs. Puncture vs. Valve Leak: What the Symptoms Suggest
Where the bubbles show up gives you a lead on which part of the system to have checked, not a final diagnosis. Use the pattern below to decide what to ask the shop to inspect first.
| Leak Location | What You May See | Suggested Next Step |
|---|---|---|
| Bead seat | Bubbles at the tire-wheel interface, visible rim edge | Bead-area inspection for corrosion or debris |
| Tread | Bubbles at an embedded object or visible puncture | Tire-repair assessment by a shop |
| Valve area | Bubbles at the stem base or sensor seal | Valve-area inspection or replacement |
Valve-stem oxidation is a documented cause of slow leaks distinct from wheel corrosion, and checking the stem for a buildup that breaks the seal is a standard first step in some manufacturer valve leak guidance. None of these three locations guarantees the tire is repairable just because you've found where air is leaking; that call still belongs to whoever inspects the wheel and tire together.
How to Manage Tire Pressure Until Service
While you arrange an inspection, the safe move is to maintain the vehicle's documented pressure, not to chase a fixed number of top-ups. Adding air keeps you rolling, but it doesn't change what's happening at the leak itself.
Use the Vehicle's Documented Cold Pressure
Your target PSI is on the tire and loading label on the driver's door edge or in the owner's manual, not the maximum pressure printed on the tire sidewall. Check pressure when the tire is cold, meaning it hasn't been driven in at least three hours, since that's the condition the placard pressure is set for. If you top off a warm tire, plan to recheck it once it's cooled and adjust again.
Know When Top-Ups Are No Longer an Interim Option
A top-up restores pressure for a while, but it does nothing to close the air path at the bead, valve, or tread. Repeated inflation is a reasonable way to keep driving short-term while you schedule service, but it stops being an adequate plan once the tire shows visible damage, can't hold the documented pressure between checks, or you notice new noise or vibration. At that point, stop relying on top-ups and get the tire inspected by a professional; don't attempt to dismount the tire or work on the bead seat yourself, since that inspection and any repair calls for tire-service equipment.
When Bead Cleaning or Resealing Is Needed
Professional service becomes the answer once a leak localizes to the bead area or won't resolve with home checks. The shop's job is to confirm the source, then decide what the wheel actually needs.
What the Tire Shop May Check
A shop can run a water-dunk leak test to pin down the exact leak location, then dismount the tire if the bead seat is implicated. Bead-seat corrosion typically looks like blistering or a rough, uneven finish on the wheel where the tire is supposed to seal, which is difficult for the tire to grip evenly. From there, a technician can clean the affected area and apply a bead sealant before remounting the tire and reassembling the wheel.
When Resealing Is Not the Whole Answer
Cleaning and resealing work for corrosion that hasn't gone past the surface, but it isn't a guaranteed fix. If the corrosion has actually pitted the metal, polishing can cause corrosion-induced rim leaks by distorting the wheel's radius at that spot, making it harder for the tire to seal. In that case, the shop may need to consider reconditioning or replacing the wheel rather than resealing it again.
What a Cordless Tire Inflator Can—and Cannot—Do
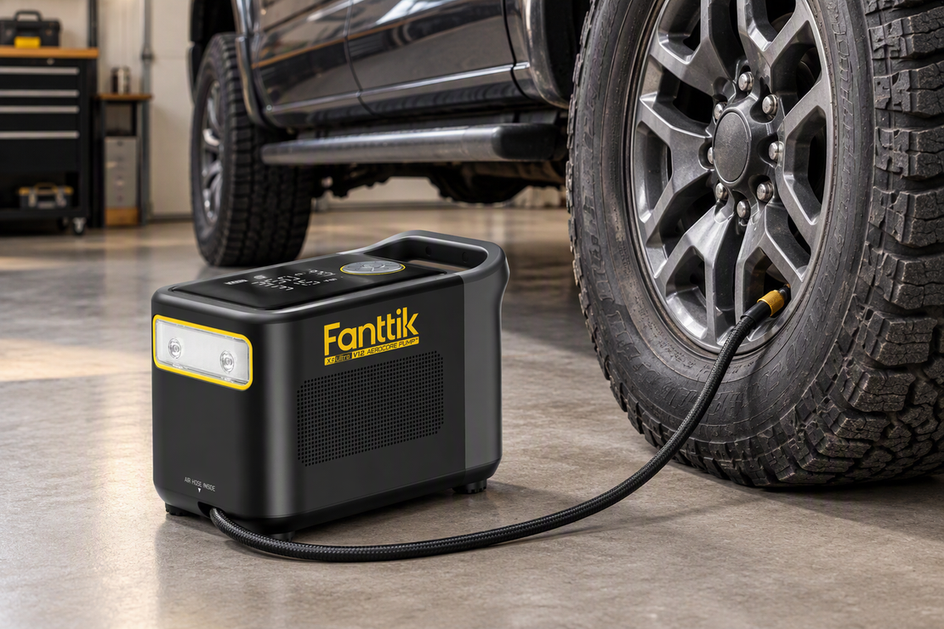
A cordless tire inflator is built to add air to your tires, and that's the extent of its job here. It can help you maintain the vehicle's documented pressure while you wait for service, but it has no way to find, clean, or repair a bead leak.
Useful for Pressure Top-Ups
For the interim period before an inspection, a cordless tire inflator lets you bring a tire back up to the placard pressure without a trip to a gas station air pump. The task here is matching the vehicle's specified PSI, not maxing out the inflator's pressure ceiling.

Not a Substitute for Tire Service
Adding air doesn't tell you where the leak is, and it can't reach the bead seat to clean or reseal it. If you're using a portable tire inflator to top off the same tire more than once or twice, treat that as a signal to schedule an inspection rather than a routine you settle into. Keeping a set of tire inflator bundles on hand is useful for ordinary maintenance, but it doesn't change the decision about when a leaking wheel needs professional attention.
FAQs
Can a tire have a bead leak even when the tread looks fine?
Yes. A clean tread only rules out an obvious puncture; it says nothing about the bead seat or the valve area. If pressure keeps dropping and the tread looks intact, check the bead edge and valve stem with soapy water before concluding there's no leak.
What if the bubbles appear around the valve stem instead of the bead?
That shifts the likely cause toward the valve stem or its sensor seal rather than wheel corrosion. Valve-area leaks are a separate, documented failure point, so if bubbling persists there, the next step is having the valve stem or sensor inspected rather than assuming the wheel itself is at fault.
Will bead resealing always fix a corroded-wheel leak?
Not necessarily. Cleaning and resealing can restore the seal when corrosion is still on the surface, but if it has pitted the metal, the repair attempt can distort the sealing surface further. A shop has to assess whether the area can actually be restored before resealing is the right call.
Can a cordless tire inflator repair a bead corrosion leak?
No. An inflator only adds air to bring pressure back to the vehicle's specified target; it can't locate, clean, or seal a bead leak. Use it for temporary top-ups while you get the wheel inspected, not as a stand-in for that inspection.
Continue reading
 CFM vs Max PSI in Portable Tire Pumps: What Determines Inflation Speed on Truck Tires?
Breaks down why airflow, not maximum PSI, governs how fast a portable tire inflator fills large truck and...
Shoulder Tread Wear vs Center Wear: How to Read Low Tire Pressure Patterns
A step-by-step visual diagnostic guide to read shoulder, center, and one-sided tire wear, check cold pressure properly, and...
CFM vs Max PSI in Portable Tire Pumps: What Determines Inflation Speed on Truck Tires?
Breaks down why airflow, not maximum PSI, governs how fast a portable tire inflator fills large truck and...
Shoulder Tread Wear vs Center Wear: How to Read Low Tire Pressure Patterns
A step-by-step visual diagnostic guide to read shoulder, center, and one-sided tire wear, check cold pressure properly, and...


Leave a comment
This site is protected by hCaptcha and the hCaptcha Privacy Policy and Terms of Service apply.